- Step 1: Create the Integration System User (ISU)
- Step 2: Create the Integration Security Group (ISSG)
- Step 3: Run the Maintain Password Rules task
- Step 4: Enable OAuth 2.0 clients
- Step 5: Register the API client for integrations
- Step 6: Recover a lost Client Secret
- Step 7: Generate the refresh token
- Step 8: Grant Domain Security Policy permissions to the ISSG
- Step 9: Activate pending security policy changes
- Step 10: Configure resume file types
- Next steps
- Legacy x509 authentication
Configure permissions
Configure Workday permissions for Indeed integration.
Who: Workday administrator
Time: ~45 minutes (one-time setup)
Configure Workday permissions to allow Indeed to access your tenant. This process creates the necessary security infrastructure for the integration.
You can complete these steps in your test tenant, production tenant, or both. Consult your Workday administrator to decide your testing strategy.
Step 1: Create the Integration System User (ISU)
-
Sign in to Workday as a user with permission to create integration system users (ISUs).
-
Search for
Create Integration System Userand select the Task.When configuring the Integration System User:
Do not select:
- Generate Random Password - Breaks authentication.
- Require New Password at Next Sign In - Causes timeout.
Required setting:
- Set Session Timeout Minutes to
0to prevent timeout.
-
Enter
ISU_Indeedin the User Name field. -
Enter a password in the New Password and New Password Verify fields.
-
Select the Do not allow UI sessions checkbox.

Create Integration System User task with step 5 labeled -
Select OK to save.
Step 2: Create the Integration Security Group (ISSG)
-
Search for
Create Security Groupand select the Task. -
Select Integration System Security Group (Unconstrained) in the Type of Tenanted Security Group dropdown.

Create Security Group task -
In the Name field, enter
ISSG_Indeed. -
Select OK.
-
Enter
ISSG_Indeedin the Name field on the Edit Integration System Security Group (Unconstrained) screen that appears.
Edit Integration System Security Group (Unconstrained) -
In the Integration System Users field, enter
ISU_Indeed. -
Select OK to save.
Step 3: Run the Maintain Password Rules task
ISU passwords expire after three months by default. After expiration, the integration stops working.
This task exempts ISU_Indeed from password expiration.
-
Search for
Maintain Password Rulesand select the Task. -
Enter
ISU_Indeedin the System Users exempt from password expiration field.
Maintain Password Rules task -
Leave all other settings unchanged.
-
Select OK to save.
Step 4: Enable OAuth 2.0 clients
-
Search for
Edit Tenant Setup - Securityand select the Task. -
Select the OAuth 2.0 Clients Enabled checkbox in the OAuth 2.0 Settings section.

Enable OAuth 2.0 clients task -
Select OK to save.
Step 5: Register the API client for integrations
-
Search for
Register API Client for Integrationsand select the Task. -
Enter
Indeedin the Client Name field.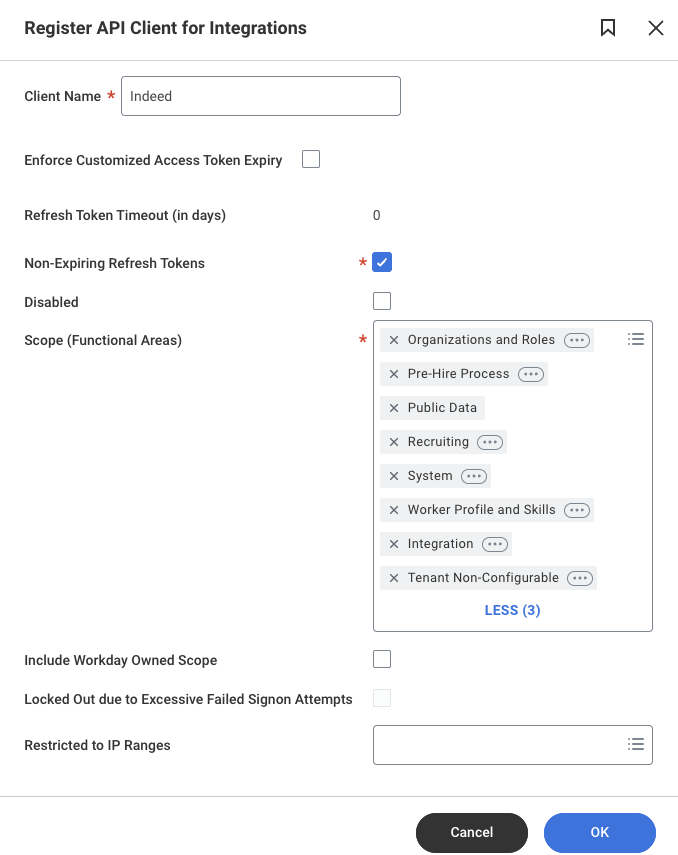
Register the API client task -
Select Non-Expiring Refresh Tokens.
-
Add these functional areas in the Scope (Functional Areas) field:
- Organization and Roles
- Pre-Hire Process
- Public Data
- Recruiting
- System
- Worker Profile and Skills
- Integration
- Tenant Non-Configurable
Copy and save the Client ID and Client Secret now. Workday does not show the Client Secret again after you leave this page.
-
Select OK to save.
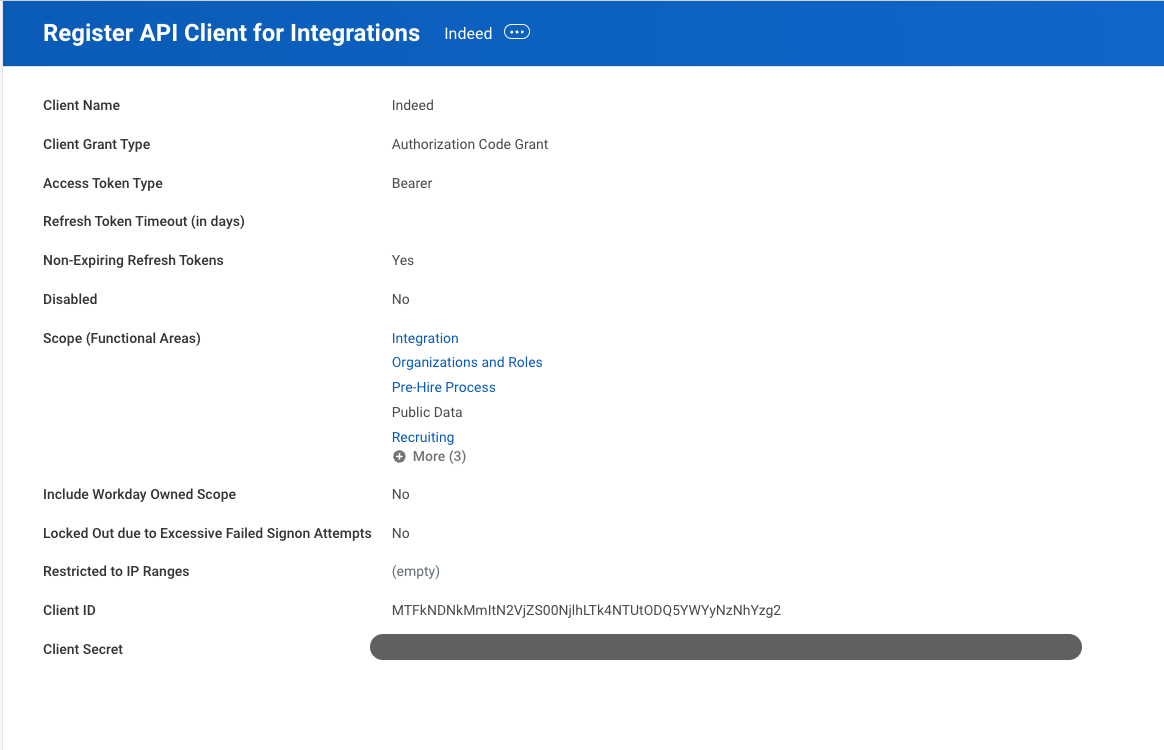
Register API Client for Integrations task showing Client ID and Client Secret -
Share the Client ID and Client Secret with your Indeed administrator.
Step 6: Recover a lost Client Secret
If you lose the Client Secret, generate a new one:
-
Search for
View API Clientsand select the Report. -
Select API Clients for Integrations tab.
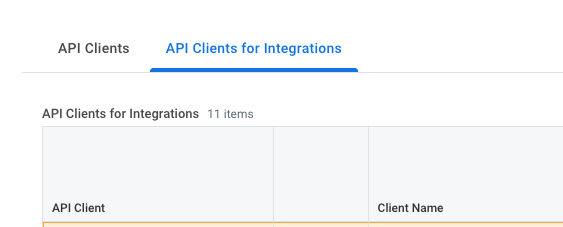
API Clients for Integrations tab in the View API Clients report -
Select Indeed in the Indeed API Client tab to open the menu, then select API Client > Generate New Client Secret.

API Client context menu with Generate New Client Secret -
Select the Confirm checkbox.

Generate New Client Secret Confirmation screen with Confirm checkbox -
Select OK.
-
Copy the new Client Secret and share it with your Indeed administrator.
-
Select Done.
Step 7: Generate the refresh token
-
Search for
View API Clientsand select the Report. -
Select API Clients for Integrations tab.
API Clients for Integrations tab in the View API Clients report -
Select Indeed in the Indeed API Client tab to open the menu, then select API Client > Manage Refresh Tokens for Integrations.

API Client context menu with Manage Refresh Tokens for Integrations -
Enter
ISU_Indeedin the Workday Account field, then select OK.
Manage Refresh Tokens for Integrations dialog with ISU_Indeed in Workday Account field -
Select the Generate New Refresh Token checkbox, then select OK.
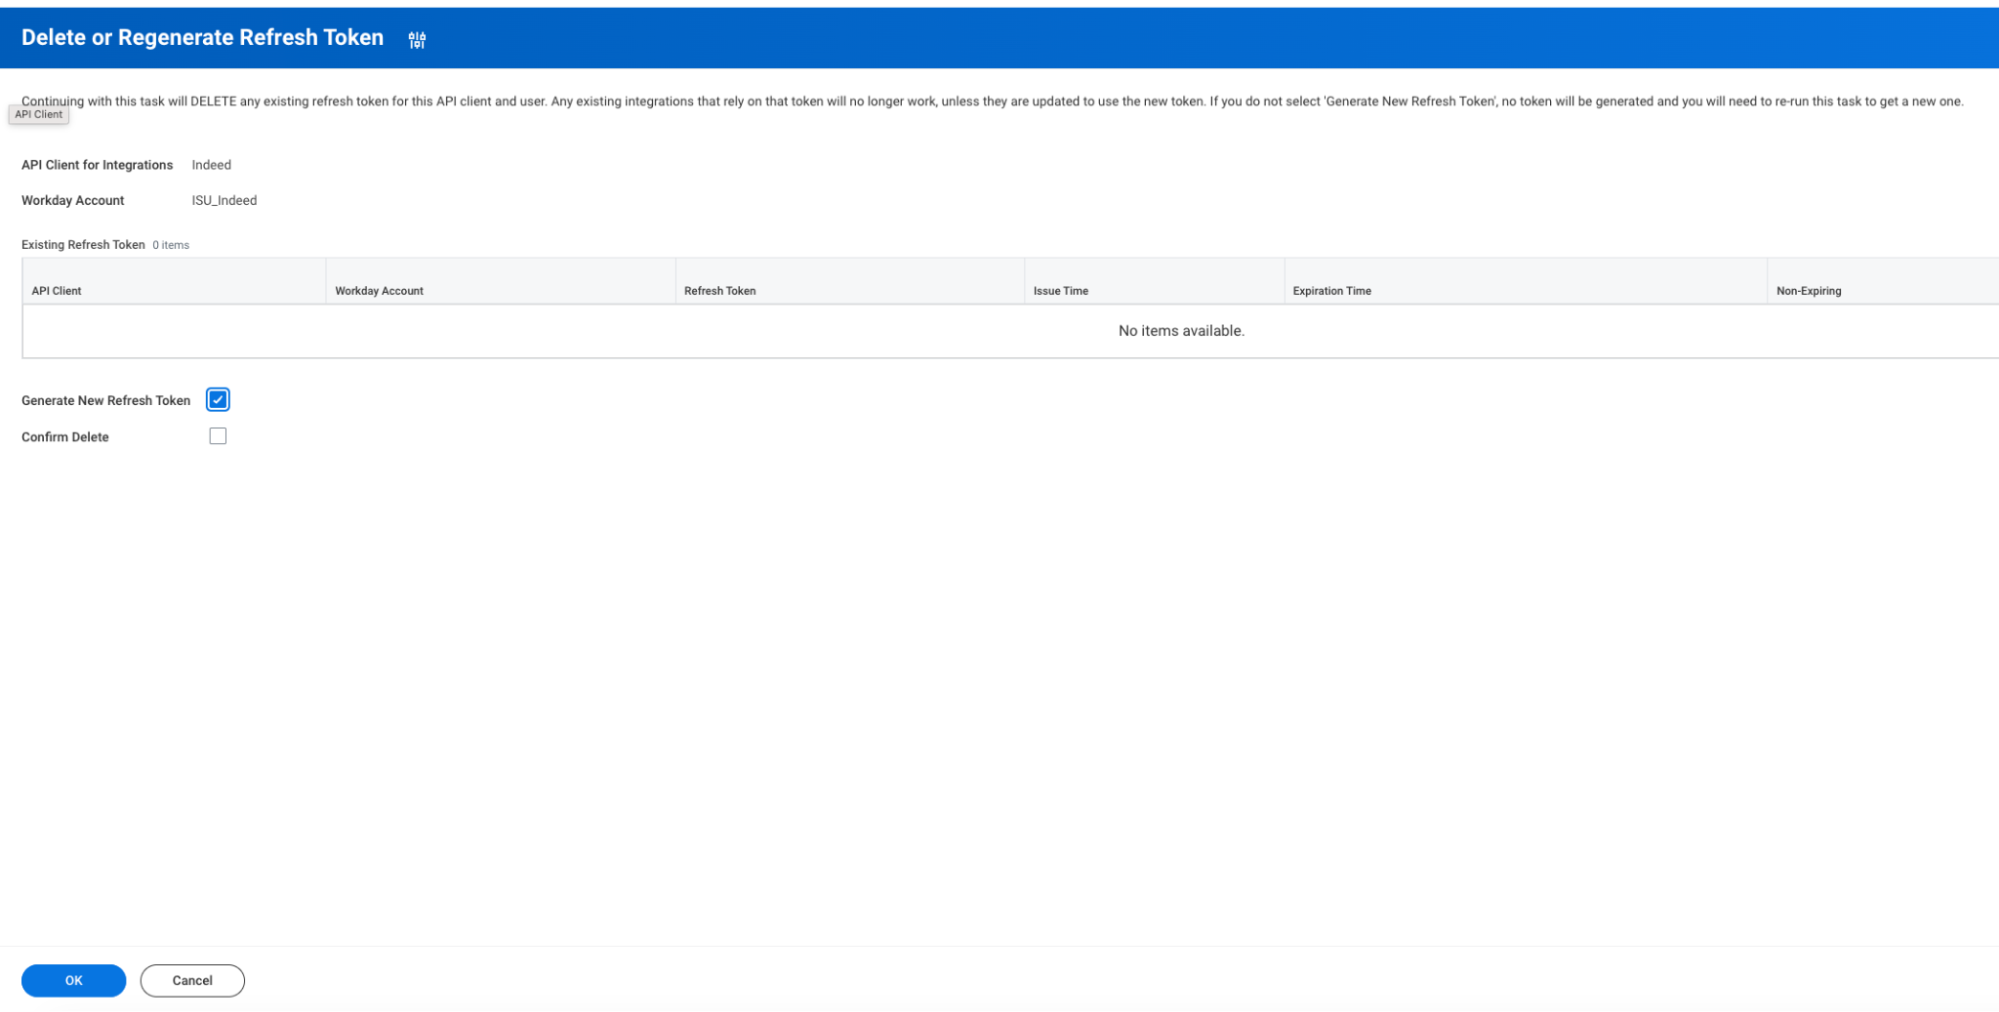
Delete or Regenerate Refresh Token screen with Generate New Refresh Token checkbox selected -
Copy and save the Refresh Token value.
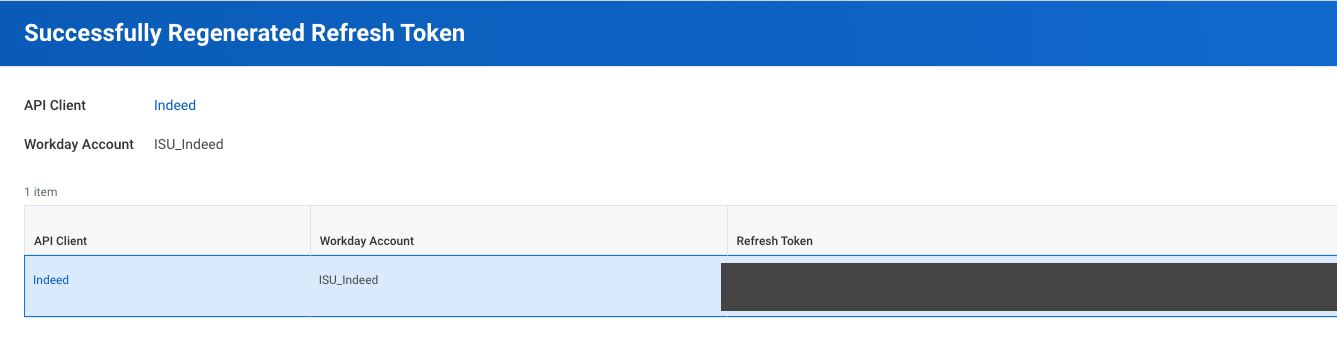
Successfully Regenerated Refresh Token screen showing the refresh token To view the refresh token later, return to View API Clients > API Clients for Integrations and use the Indeed button on the Indeed API Client row.
-
Select Done.
Step 8: Grant Domain Security Policy permissions to the ISSG
-
Search for
View Security Groupand select the Task. -
Enter
ISSG_Indeedin the Security Group field in the task popup, then select OK. -
Navigate to the domain permissions:
- Select the related action icon.
- Scroll down to Security Group.
- Select Maintain Domain Permissions for Security Group.

Maintain Domain Permissions for Security Group selected in the Security Group task -
Add policies to the Integration Permissions section and the Report/Task Permissions section from the table in step 5:
- In the Integration Permissions section, search and add all policies in the Domain Security Policies permitting Get and Put access field.
- In the Report/Task Permissions section, search and add all policies that permit view and modify access.

Domain Security Policies permitting Get access -
Search for and add each policy in the table:
Required policies Operation Domain Security Policy Workday Securable Item needed by Indeed secured by domain policy Purpose Get and Put Candidate Data: Job Application Securable Integrations: Get Candidates (Web Service) - Web Service Task
Securable Integrations: Put Candidate (Web Service) - Web Service Task
Get Candidate
Get Job Application Additional Data
Put Candidate
Put Job Application Additional Data
Get and Put Candidate Pool: View and Modify Pool Candidate Pools - Data Source Get Candidate Pools
NOTE: Required only if you use Indeed Smart Sourcing or another product that delivers prospects.
Get Only Integration Build Securable Integrations: Get References (Web Service) - Web Service Task Get References Get Only Job Requisition Data Securable Integrations: Get Job Requisitions (Web Service) - Web Service Task Get Job Requisitions Get Only Job Postings: External Securable Integrations: Get Job Postings (Web Service) - Web Service Task Get Job Postings Get Only Job Requisitions for Recruiting Securable Reporting Items by Integration Permissions: Job Requisitions - Indexed - Data Source (Workday Owned) Get recruiting-specific job requisition indexed data used for calculated field retrieval Get Only Manage: Evergreen Requisitions Securable Integrations: Get Evergreen Requisitions (Web Service) - Web Service Task Get Evergreen Requisitions Get Only Manage: Location Securable Integrations: Get Locations (Web Service) - Web Service Task Get Locations Get Only Manage: Organization Integration Securable Integrations: Get Organizations (Web Service) - Web Service Task Get and find organizations Get Only Questionnaire Creation and Distribution Securable Integrations: Get Questionnaires (Web Service) - Web Service Task
Securable Reporting Items by Integration Permissions: Questionnaires - Data Source (Workday Owned)
Access questionnaire data Get Only Set Up: Skills and Experience Securable Integrations: Get Degrees (Web Service) - Web Service Task
Securable Integrations: Get Work Experiences (Web Service) - Web Service Task
Get Job Requisition education and experience requirements View and Modify Workday Query Language Securable Actions: wql/data/view (GET) (v1 - ) - Service Operation
Securable Actions: wql/data/view (POST) (v1 - ) - Service Operation
Securable Actions: wql/dataSources/view (GET) (v1 - ) - Service Operation
Securable Actions: wql/dataSources/fields/view (GET) (v1 - ) - Service Operation
Fetch questionnaire data
Fetch calculated company name fields (post)
Get and Put Prospects Securable Integrations: Get Prospects (Web Service) - Web Service Task
Securable Integrations: Put Prospects (Web Service) - Web Service Task
Deliver prospect data to candidate pools.
NOTE: Required only if you use Indeed Smart Sourcing or another product that delivers prospects.
-
Select OK to save.
Step 9: Activate pending security policy changes
-
Search for
Activate Pending Security Policy Changesand select the Task. -
Describe your changes in the Comment field.
-
Select OK to save.
-
Select the Confirm checkbox to activate your changes.

Confirm checkbox in the Activate Pending Security Policy Changes task -
Select OK to submit.
Step 10: Configure resume file types
If resume file types are not enabled, candidate applications do not reach your Workday tenant. Configure file types before you complete the integration.
-
Search for
Edit Tenant Setup - Systemand select the Task. -
Scroll down to the System Setup section on the Edit Tenant Setup - System screen.
-
Select Allow ONLY Specific File Types for File Type Setup Instructions.

File Type Setup Instructions section with Allow ONLY Specific File Types selected -
Verify the Allow ONLY Specific File Types list includes these file extensions:
docdocxodtpdfrtftxt
-
Add any missing required file types to the list.
-
Select OK to save.
Next steps
You have configured Workday permissions for the Indeed integration.
You completed:
- Created the Integration System User (ISU).
- Created the Integration Security Group (ISSG).
- Configured password rules.
- Enabled OAuth 2.0 clients.
- Registered the API client for integrations.
- Generated a Refresh Token for the ISU.
- Granted domain security policy permissions.
- Activated pending security policy changes.
- Configured resume file types.
What's next:
You can optionally configure:
- Configure EEO questionnaire: configure this if your company collects EEO data from applicants.
- Configure custom organization: configure this if you need a custom company name for Indeed job postings.
Or continue to the next required step:
Legacy x509 authentication
For existing x509 installations, new integrations use refresh-token authentication. Follow the standard steps.
If you received a certificate update notice, use this procedure to replace your current Indeed x509 certificate before it expires. Replacing the certificate keeps job ingestion and application delivery running.
-
Search for
Edit X.509 Public Keyand select the Task. -
Select the existing Indeed certificate.
-
Replace the certificate with the following:
-----BEGIN CERTIFICATE-----MIIDCzCCAfOgAwIBAgIURuJaukD4Ow7/z+gr/CkuJ8ogypwwDQYJKoZIhvcNAQELBQAwLjELMAkGA1UEBhMCVVMxDjAMBgNVBAgMBVRleGFzMQ8wDQYDVQQKDAZJbmRlZWQwHhcNMjYwMTIyMjEwMTAxWhcNMjcwNjMwMjEwMTAxWjAuMQswCQYDVQQGEwJVUzEOMAwGA1UECAwFVGV4YXMxDzANBgNVBAoMBkluZGVlZDCCASIwDQYJKoZIhvcNAQEBBQADggEPADCCAQoCggEBAMDGqa5zY5O/jcrvdzAiheNVIT2hGgLJUHs9CMmMHJGza2tu4yQfIucn3n/hdOOs4qJLCUgsfRdTrc7U9UUxpuvSwZ4S+PPkVrPhQB2ju9DmocAMisb41gsLdofDo8YGO1+dq7d7NmA+Ke7fTWjetZn4Lt3QPTHyJsnS6UaNE8owvKRojT8FRFcsjLWMpGDIAShFomPjv1o5yhPiWoGsKoQYSMp2lu2int10R+91a2KAyxonqH8AXG773lhFhzM3dj3C8rtmldk7c5umyw5fnprvcP4Jcqv66ffMTcWXxdOr2+3R1D+cAPln+UpLLVk6M7vjSlU7rwY325N/IDZdHPUCAwEAAaMhMB8wHQYDVR0OBBYEFHj5SqGn/RPWlavV9ILBCUNh4ebeMA0GCSqGSIb3DQEBCwUAA4IBAQBstBu82blcL2SuIXSuJaGS6urjN5ppsWvRjeLa1smsxOyX6w4fPxEe5i6/aaLrqr8xhV9xHIAoN6ZnMfkexAooEeKqmRiEgJFnQdKt0RK0Lk3ykTajfLMiuDeNH3JYYUFrkpKskbYbw4a2gzRF2fKRLFYrE/TMKZbOcE3ovMo7+MSCOmNC1Ec8Vs2UvYHGzgEW2LU5RFUKox41c5USL8M9hX/MJbsRVBvkhHj6Dp7KFTZr3Ve80uhmixMgax4SHbXi+p/WXVUNWwwUmFi6N8Xqh4bR7qeySyNHCYvKfK8JeSdkEQ/cFF/ndnHxt8qWdroF/sRsUQ+7k2AD58D+DmVU-----END CERTIFICATE-----Copy all text in the code block, including
-----BEGIN CERTIFICATE-----and-----END CERTIFICATE-----. -
Select OK to save.
A certificate update notice might mention "step 4." That refers to the original x509 installation steps, now in Legacy x509 installation. To update your certificate, use the previous procedure.