- Before you start
- Step 1: Create a SuccessFactors API user account
- Step 2: Grant permissions to the SuccessFactors API user account
- Step 3: Configure IP allowlist
- Step 4: Locate your API server URL
- Step 5: Create a private X.509 certificate and API key
- Step 6: Map job requisition fields from SAP to Indeed fields
- Step 7: Download job application XML templates
- Step 8: Download candidate profile XML template
- Next steps
Configure information in SuccessFactors
Set up SuccessFactors API user, permissions, X.509 certificate, and template files for Indeed integration.
Who: SuccessFactors administrator
Time: ~45–60 minutes (one-time setup)
Before you start
Confirm you have the Job Requisition mapping spreadsheet and test implementation plan from your Indeed representative (see installation overview).
A SuccessFactors administrator with Indeed account administrator access to the integration installation page can complete this section alone. Otherwise, the SuccessFactors administrator and Indeed account administrator complete it together.
For questions about this process, contact your SuccessFactors representative.
Step 1: Create a SuccessFactors API user account
Create a SuccessFactors API user account for this integration.
Step 2: Grant permissions to the SuccessFactors API user account
Grant these permissions to the SuccessFactors API user account.
The Employee Central permission applies only if you have access to Employee Central.
| Permission group | Select permission |
|---|---|
| Recruiting Permissions |
|
| Employee Central (only if you have access) |
|
| Manage Integration Tools |
|
| Manage MDF Recruiting Objects |
|
| Manage System Properties |
|
| Metadata Framework |
|
Step 3: Configure IP allowlist
If you use an IP allowlist, go to Admin Center → Password & Login Policy Settings → API Login Exceptions and add these Indeed IP addresses:
3.137.9.2193.135.136.2283.137.6.2233.128.63.1953.21.142.4218.219.101.101

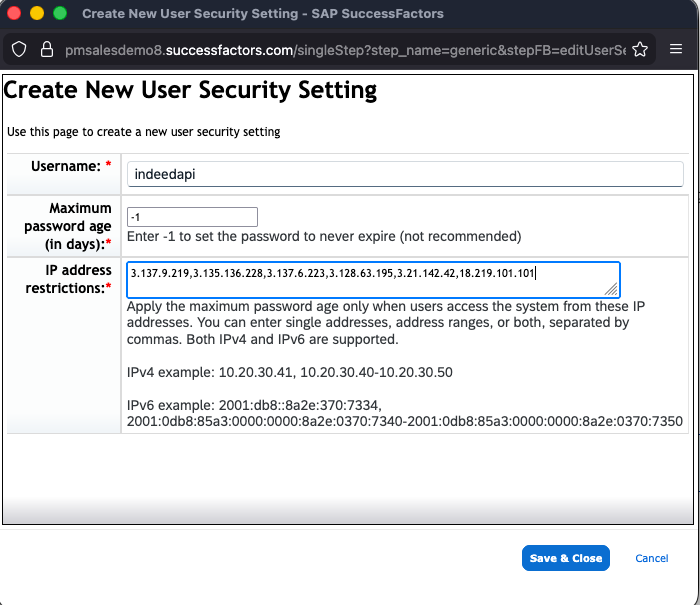
This integration uses OAuth 2.0. To prevent interruptions, track credential expiration dates and keep the API administrator password from expiring. If you change the password, update the Indeed configuration immediately — an expired or incorrect password stops the integration.
Step 4: Locate your API server URL
-
Identify your SAP deployment's data center, environment, and location.
Use the List of SAP SuccessFactors API Servers to find the URL.
Step 5: Create a private X.509 certificate and API key
In SuccessFactors, create a private key (X.509) and client key (API key):
-
Go to Admin Center and search for
Manage OAuth2 Client Applications.
Search for Manage OAuth2 Client Applications and use Register Client Application to add an app. -
Select Register Client Application in the top right.

Register New OAuth2 Client Application form where you enter Application Name and Application URL. -
Verify that Company shows a pre-filled value.
-
Enter
Indeed Candidate Syncin Application Name. -
Add a description in Description.
-
Enter
https://www.indeed.com/in Application URL. -
Select Bind to Users.
-
Enter the API user account ID in User IDs.
-
Select Generate X.509 Certificate in X.509 Certificate.
-
Select Download to save your private key (available only at this step), then select Register.
-
Enter
indeed.comin Common Name (CN). -
Enter a large number in Validity Days. The maximum is 36499, and Indeed recommends using it. The integration stops when the certificate expires. Keep valid credentials in the Indeed configuration.
-
Select Generate.

Use Self Assign a new X.509 Certificate to generate the certificate, then download the private key before it disappears. 
After registration, the View an existing OAuth Client Application screen shows the Client ID (API key) for Indeed.
Use the downloaded private key in Private Key and the API key in Client ID when you run the Indeed installation.
Step 6: Map job requisition fields from SAP to Indeed fields
Use the job requisition mapping spreadsheet from your Indeed representative to map SAP fields to Indeed fields.

-
Enter the template name in column B, row 2.
-
Map SAP fields in column B to Indeed fields in column A.
-
Go to Admin Center → OData API Data Dictionary.
Search for
JobRequisitionand select Search. -
Select JobRequisition.
-
Enter the full path for each field in column A, using periods (
.) as separators. All paths start withJobRequisition. -
Find the field in the Property Name column.
Some fields come directly from
JobRequisition. For picklist or foundation object fields, select the blue link to get the next value. -
Repeat until you reach the actual field value.
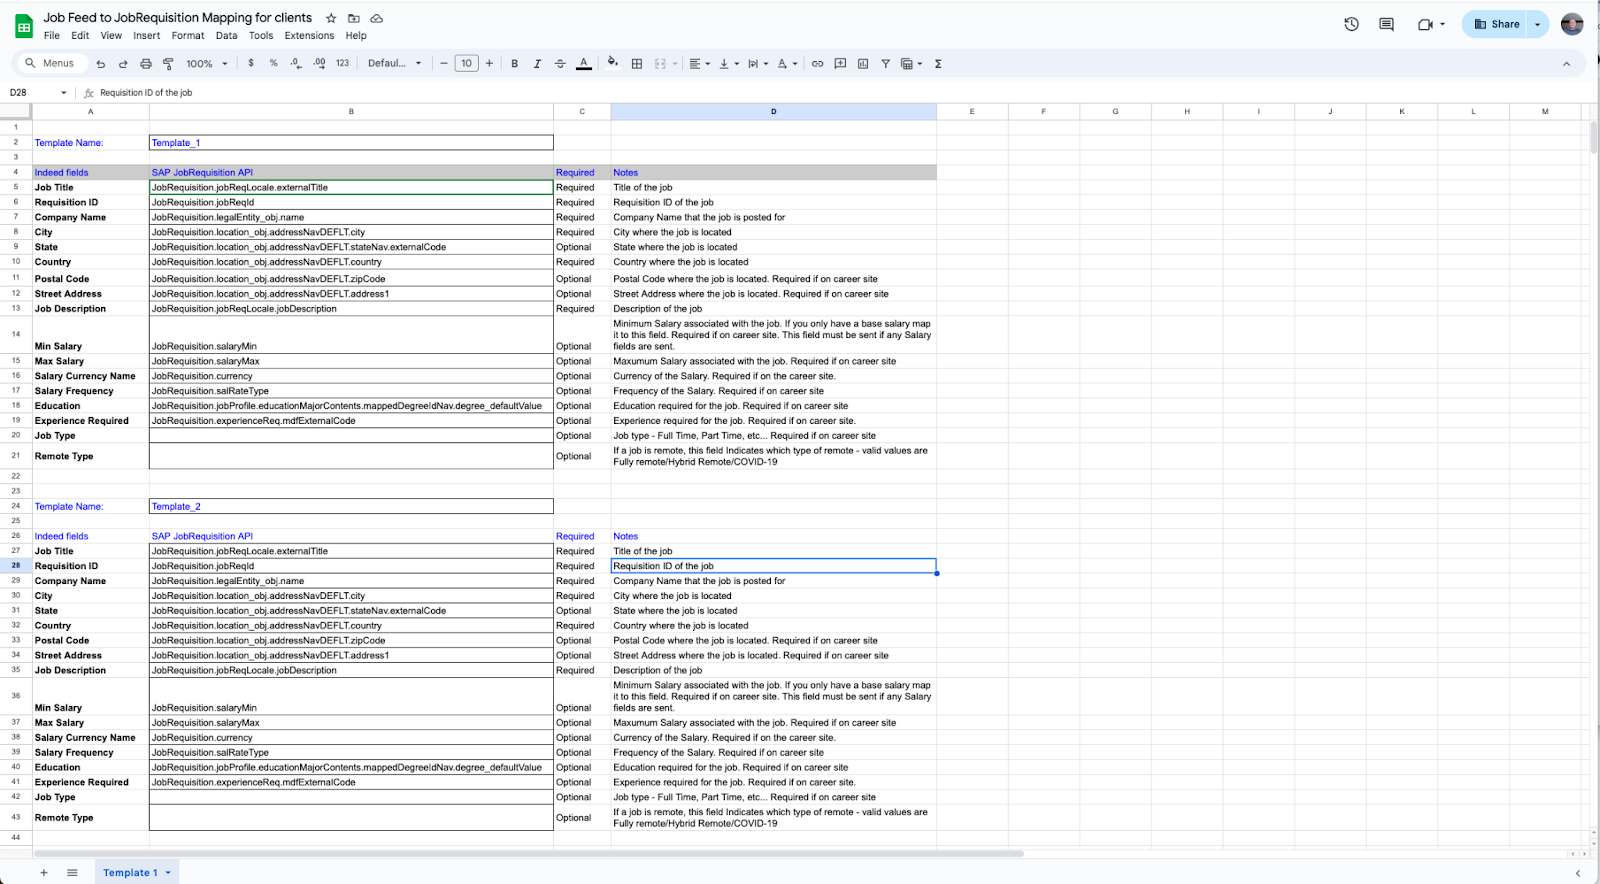
For more templates, copy rows.
-
Repeat for each job requisition template.
With two templates, the spreadsheet looks like this:
- Download each job requisition template and rename files to their IDs. See How to export Recruiting XML Templates from Manage Templates?.
When editing the mapping sheet:
-
Edit only column B. Do not modify other columns.
-
Leave the cell in column B empty to skip an optional field.
-
For picklist fields, include both the field and picklist location.
Example:
JobRequisition.country.picklistLabels.labelinstead ofJobRequisition.country.
- Save as
fields.csv. Other formats and file names are not supported.
Step 7: Download job application XML templates
-
Follow How to export Recruiting XML Templates from Manage Templates? in the SAP Provisioning UI to get the job application mapping XML files. Use one XML file per template.
-
Rename each XML file with its template ID. To find template IDs, sign in to SAP for Me and follow the instructions.
Use the same process for all active job requisition templates.
Step 8: Download candidate profile XML template
-
Follow How to export Recruiting XML Templates from Manage Templates? in the SAP Provisioning UI to obtain the latest candidate profile XML file. The Indeed installation steps use this file.
-
Rename the file to
Candidate.xml.
Next steps
You have configured SuccessFactors for the Indeed integration.
Completed:
- Created the SuccessFactors API user account.
- Granted permissions to the API user account.
- Configured IP allowlist (if applicable).
- Located your API server URL.
- Created the private X.509 certificate and API key.
- Downloaded and mapped job requisition fields from SAP to Indeed fields.
- Downloaded job application XML templates.
- Downloaded the candidate profile XML template.
Next: