Install the integration with Indeed
Complete the integration setup in Indeed Integrations Hub.
Who: Oracle HCM administrator and Indeed Employer Home administrator
Time: ~10 minutes (one-time setup)
Complete the integration setup in Indeed Integrations Hub: enter Oracle credentials, upload the configuration package, test the connection, and activate the integration. Use an admin account.
Step 1: Access the integration setup
-
Click Get started.
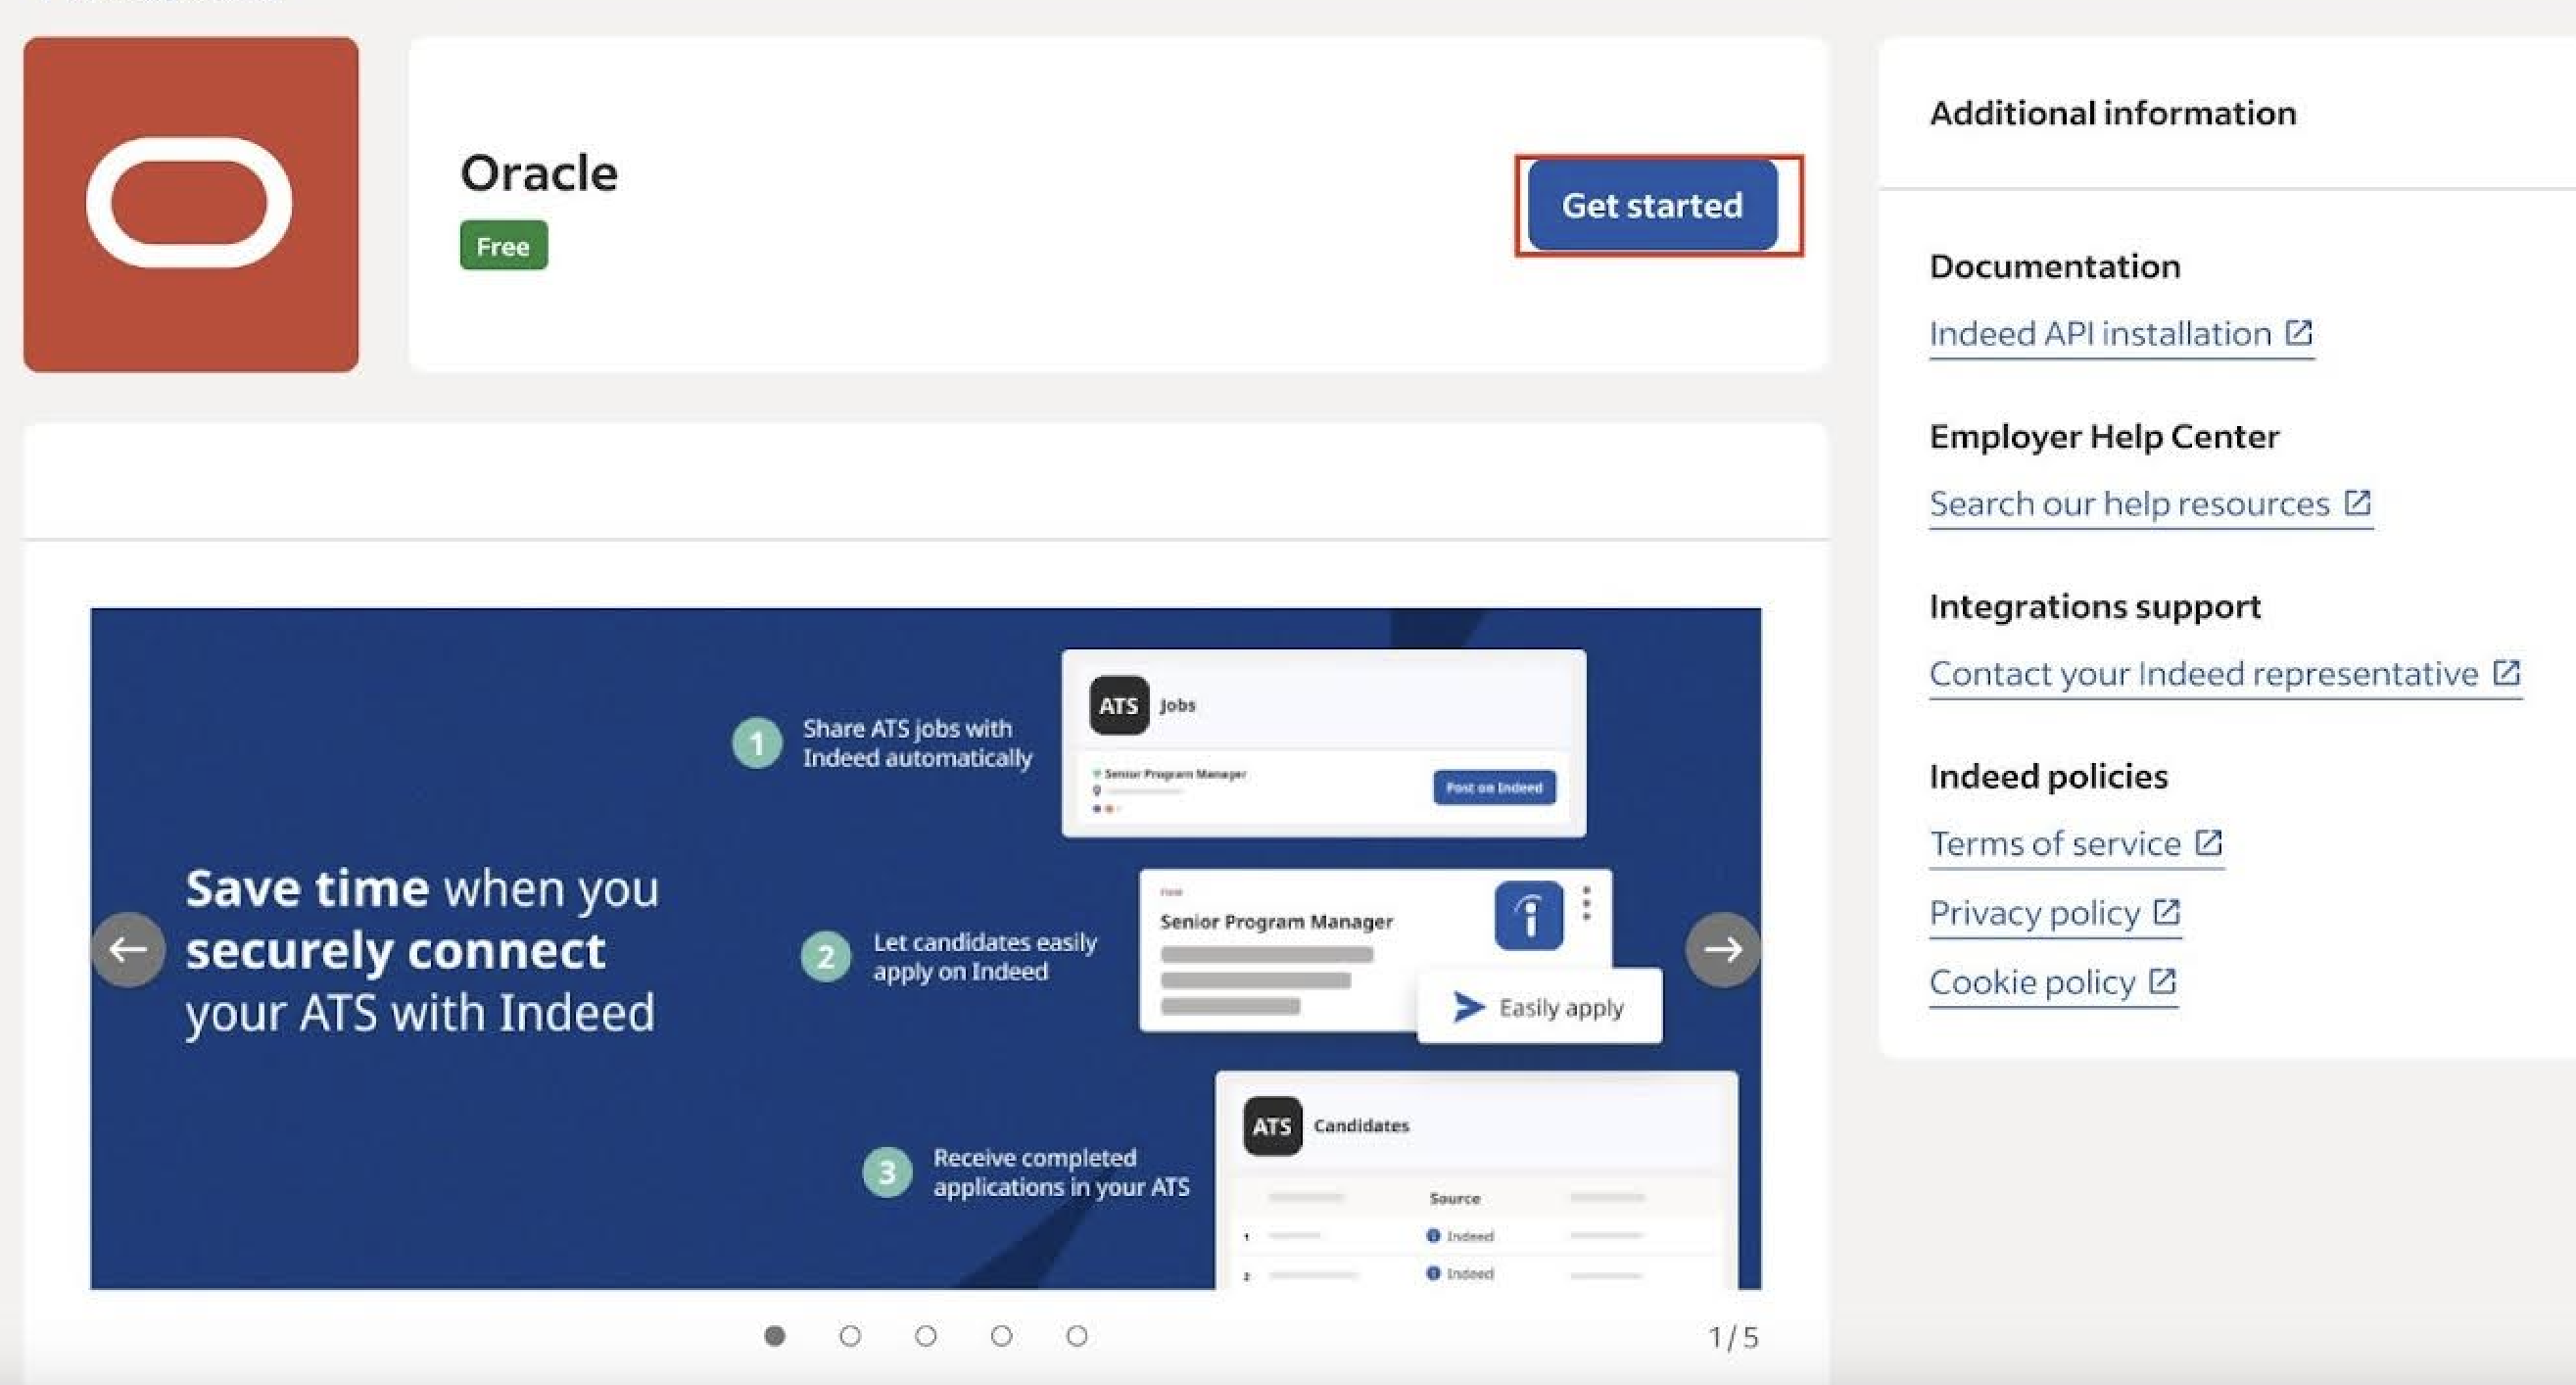
Begin the Oracle integration setup
Step 2: Plan and configure
-
Click I'm ready to start now and then Continue.
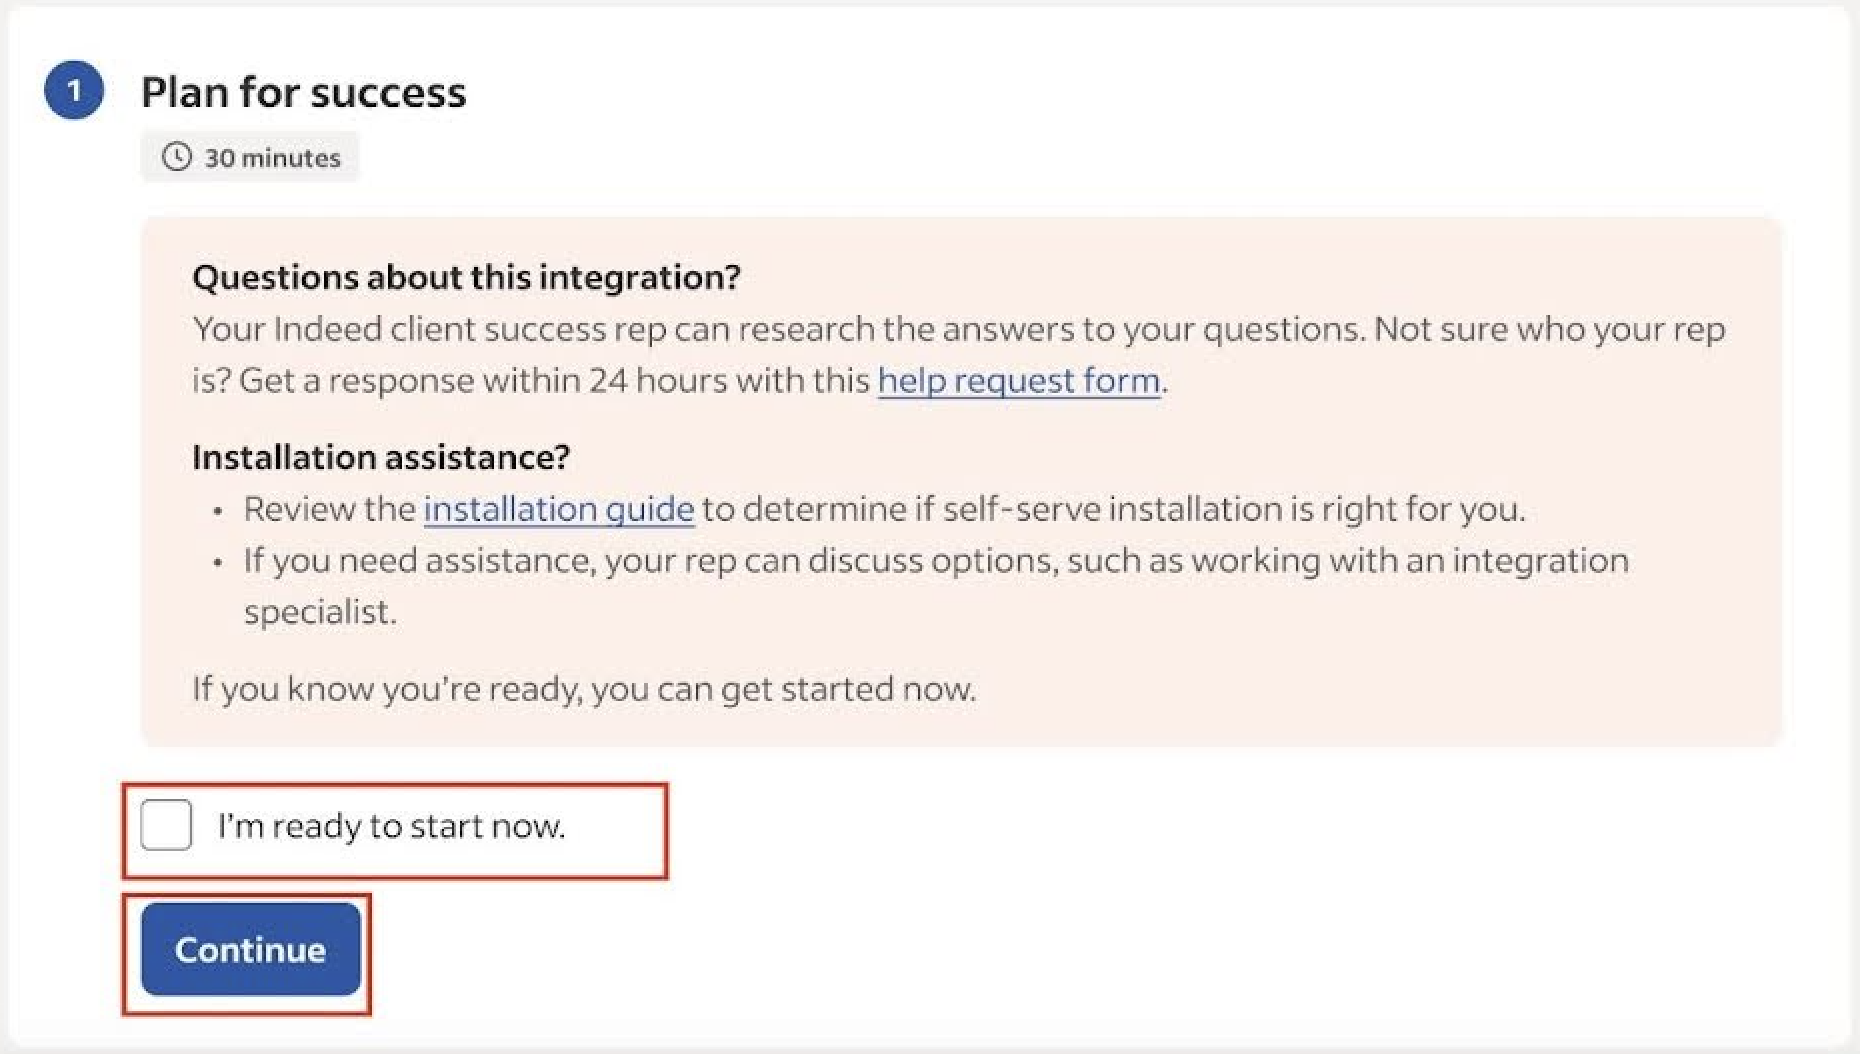
Confirm you're ready to begin the installation -
Confirm that you completed Configure Oracle HCM. Select the checkbox, then click Continue.
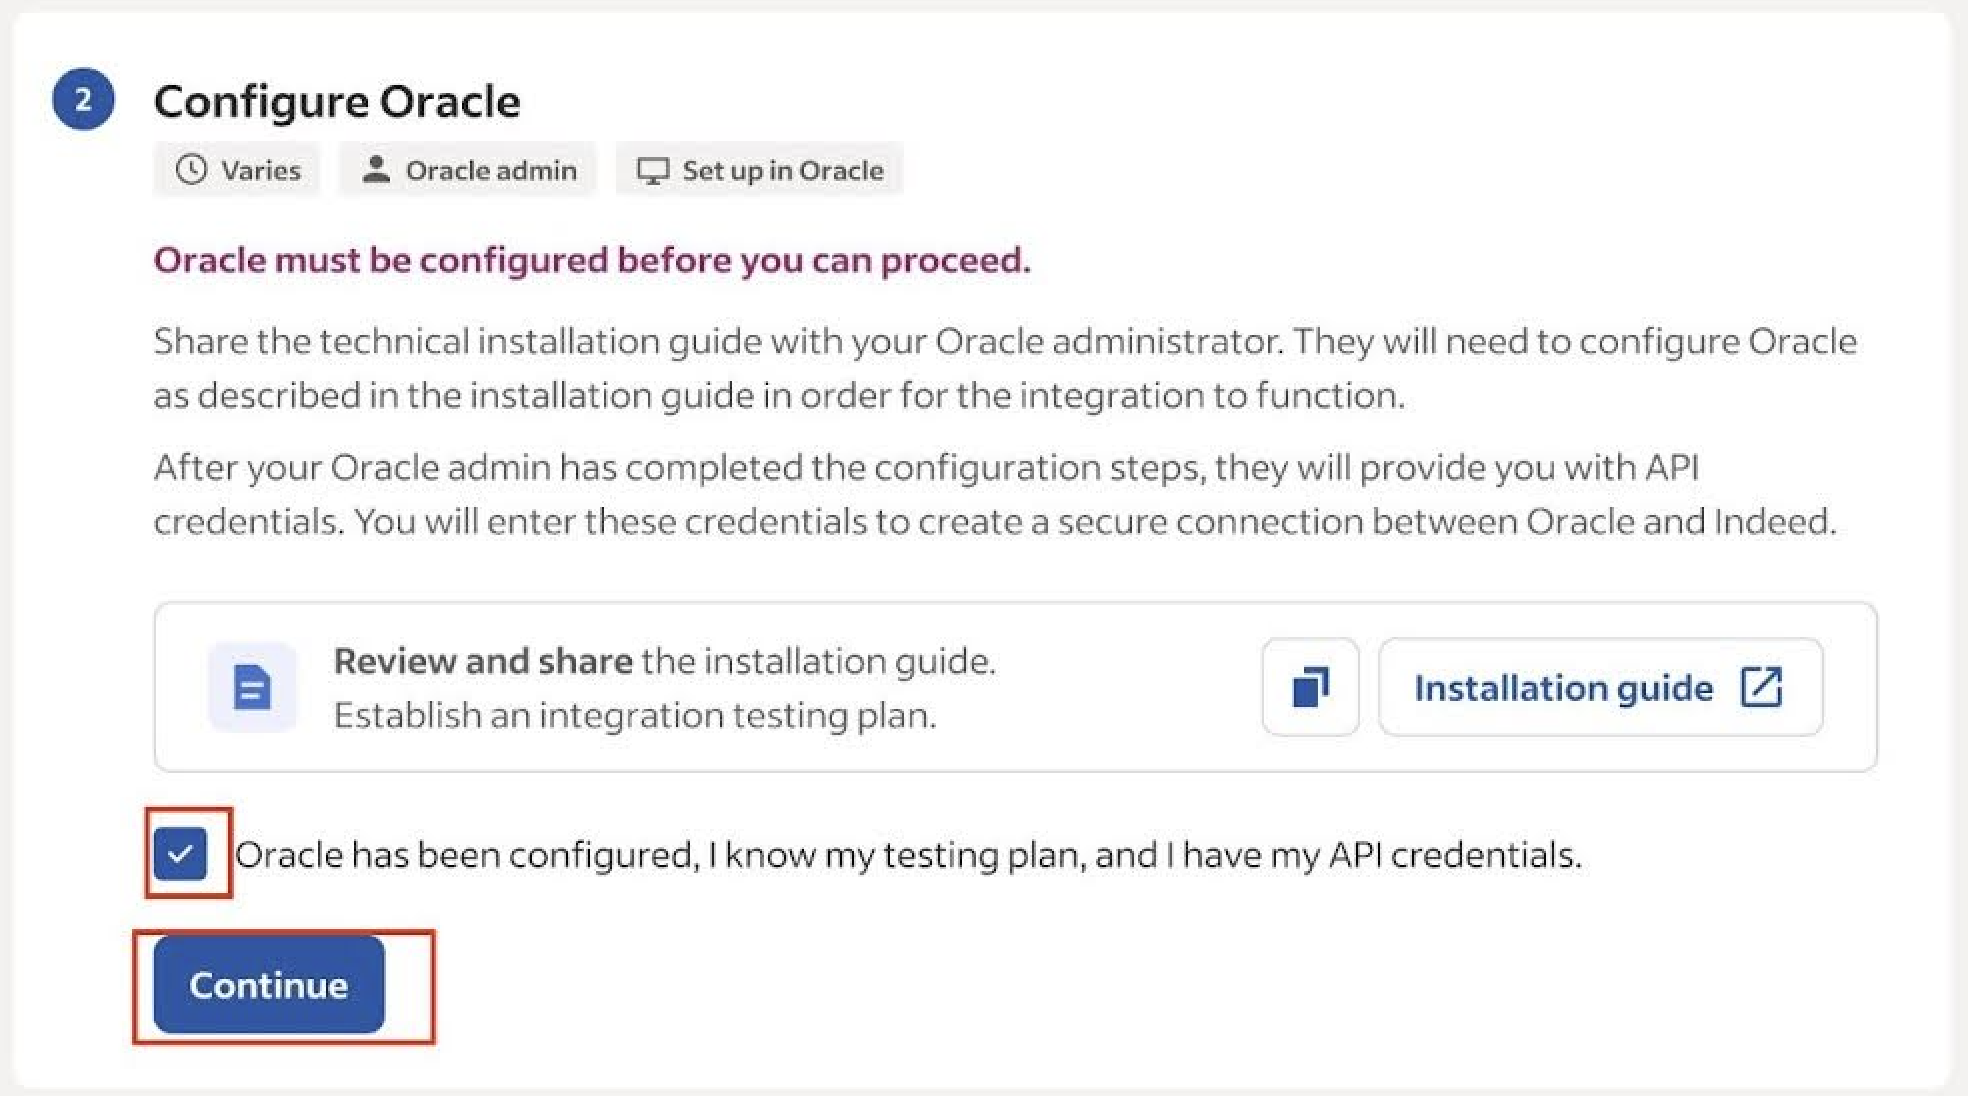
Confirm Oracle HCM configuration is complete
Step 3: Upload the configuration package to Oracle
For details on uploading and importing the package in Oracle, see Set Up Partner Enablement (opens in a new window) on the Oracle website.
- Download the ZIP file.
- Click Profile at the top right in Oracle HCM.
- Click Setup and Maintenance on Settings and Actions.
- Click the Page icon at the far right.
- Click Manage Configuration Packages in the right pane.
- Click Upload.
- Select the ZIP file you downloaded after clicking Choose File.
- Follow the prompts to finish the upload.
- Select the row showing Upload - Completed Successfully, then click Import Setup Data.
- When the import finishes, Oracle creates an Indeed Direct Apply profile.
- Confirm that the Indeed Direct Apply profile is Active. The profile must be active for the connection to work.
When you edit the Indeed Direct Apply partner profile, leave the reference key, client ID, and client secret blank, then activate and save. You create these credentials later, in Step 5: Prepare to go live, then return to this page to enter them. In a test environment, leave these fields blank. Enter them only in production.
Step 4: Test your configuration
Enter test credentials and verify the job feed before you go live.
Your application data settings control which categories of information Indeed asks job seekers for. See Structured data.
-
Enter:
- API URL.
- API username and password from Configure Oracle HCM.
Click Continue.
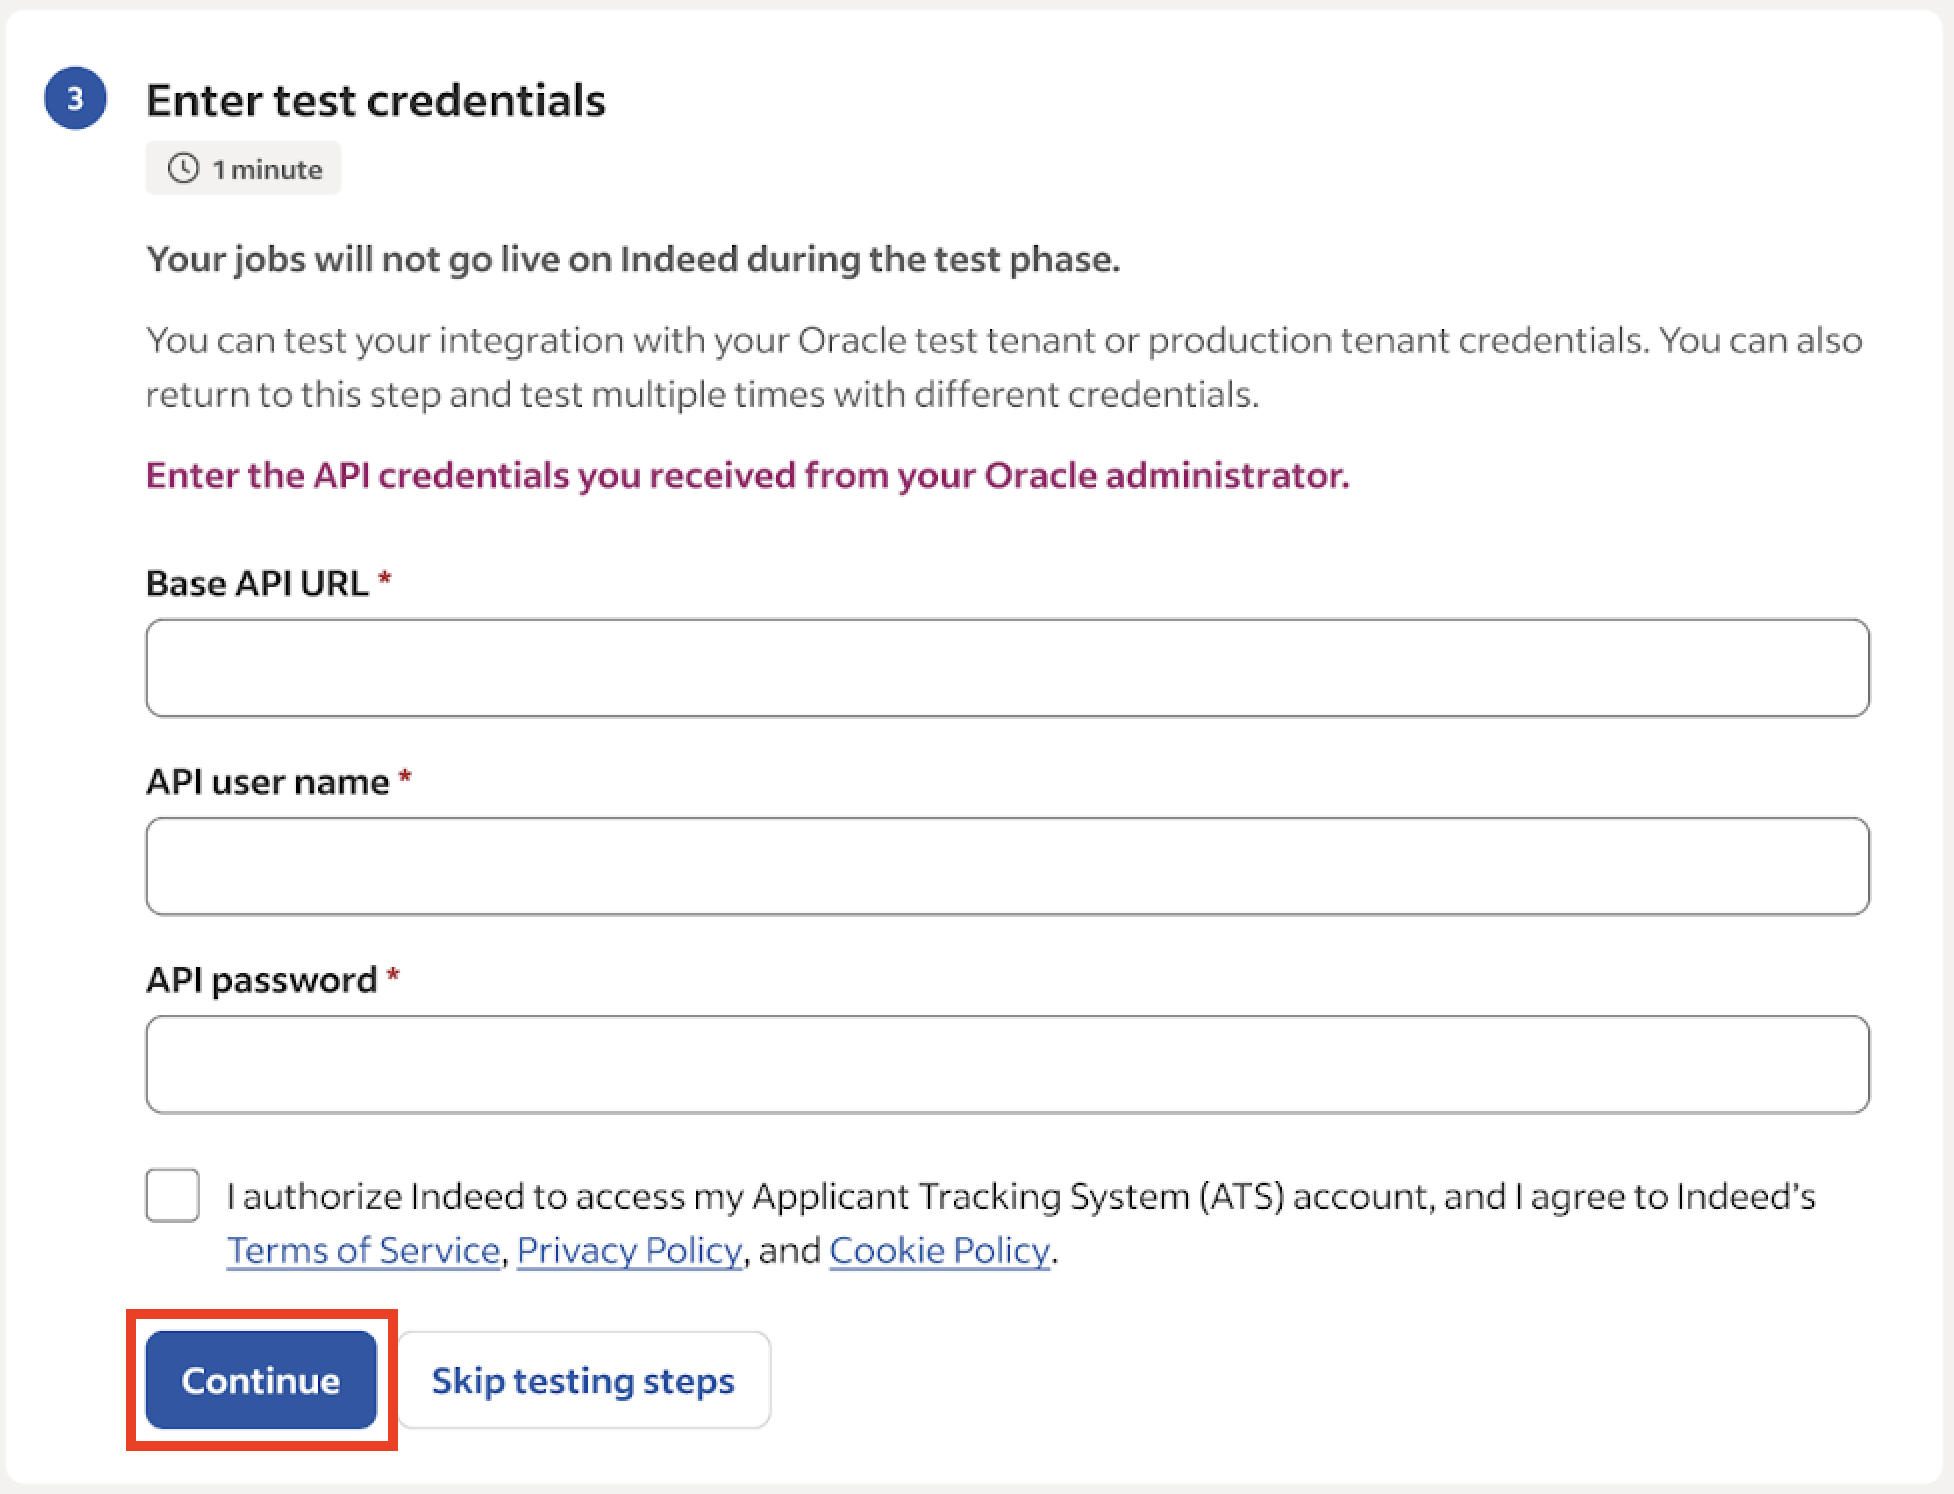
Enter test credentials to verify the connection -
Choose a company name setting:
- Use organization names from Oracle.
- Use a custom company name.
- Use an Oracle descriptive flexfield.
If you use an Oracle descriptive flexfield, first configure it in Oracle. See Send requisition flexfields to Indeed.
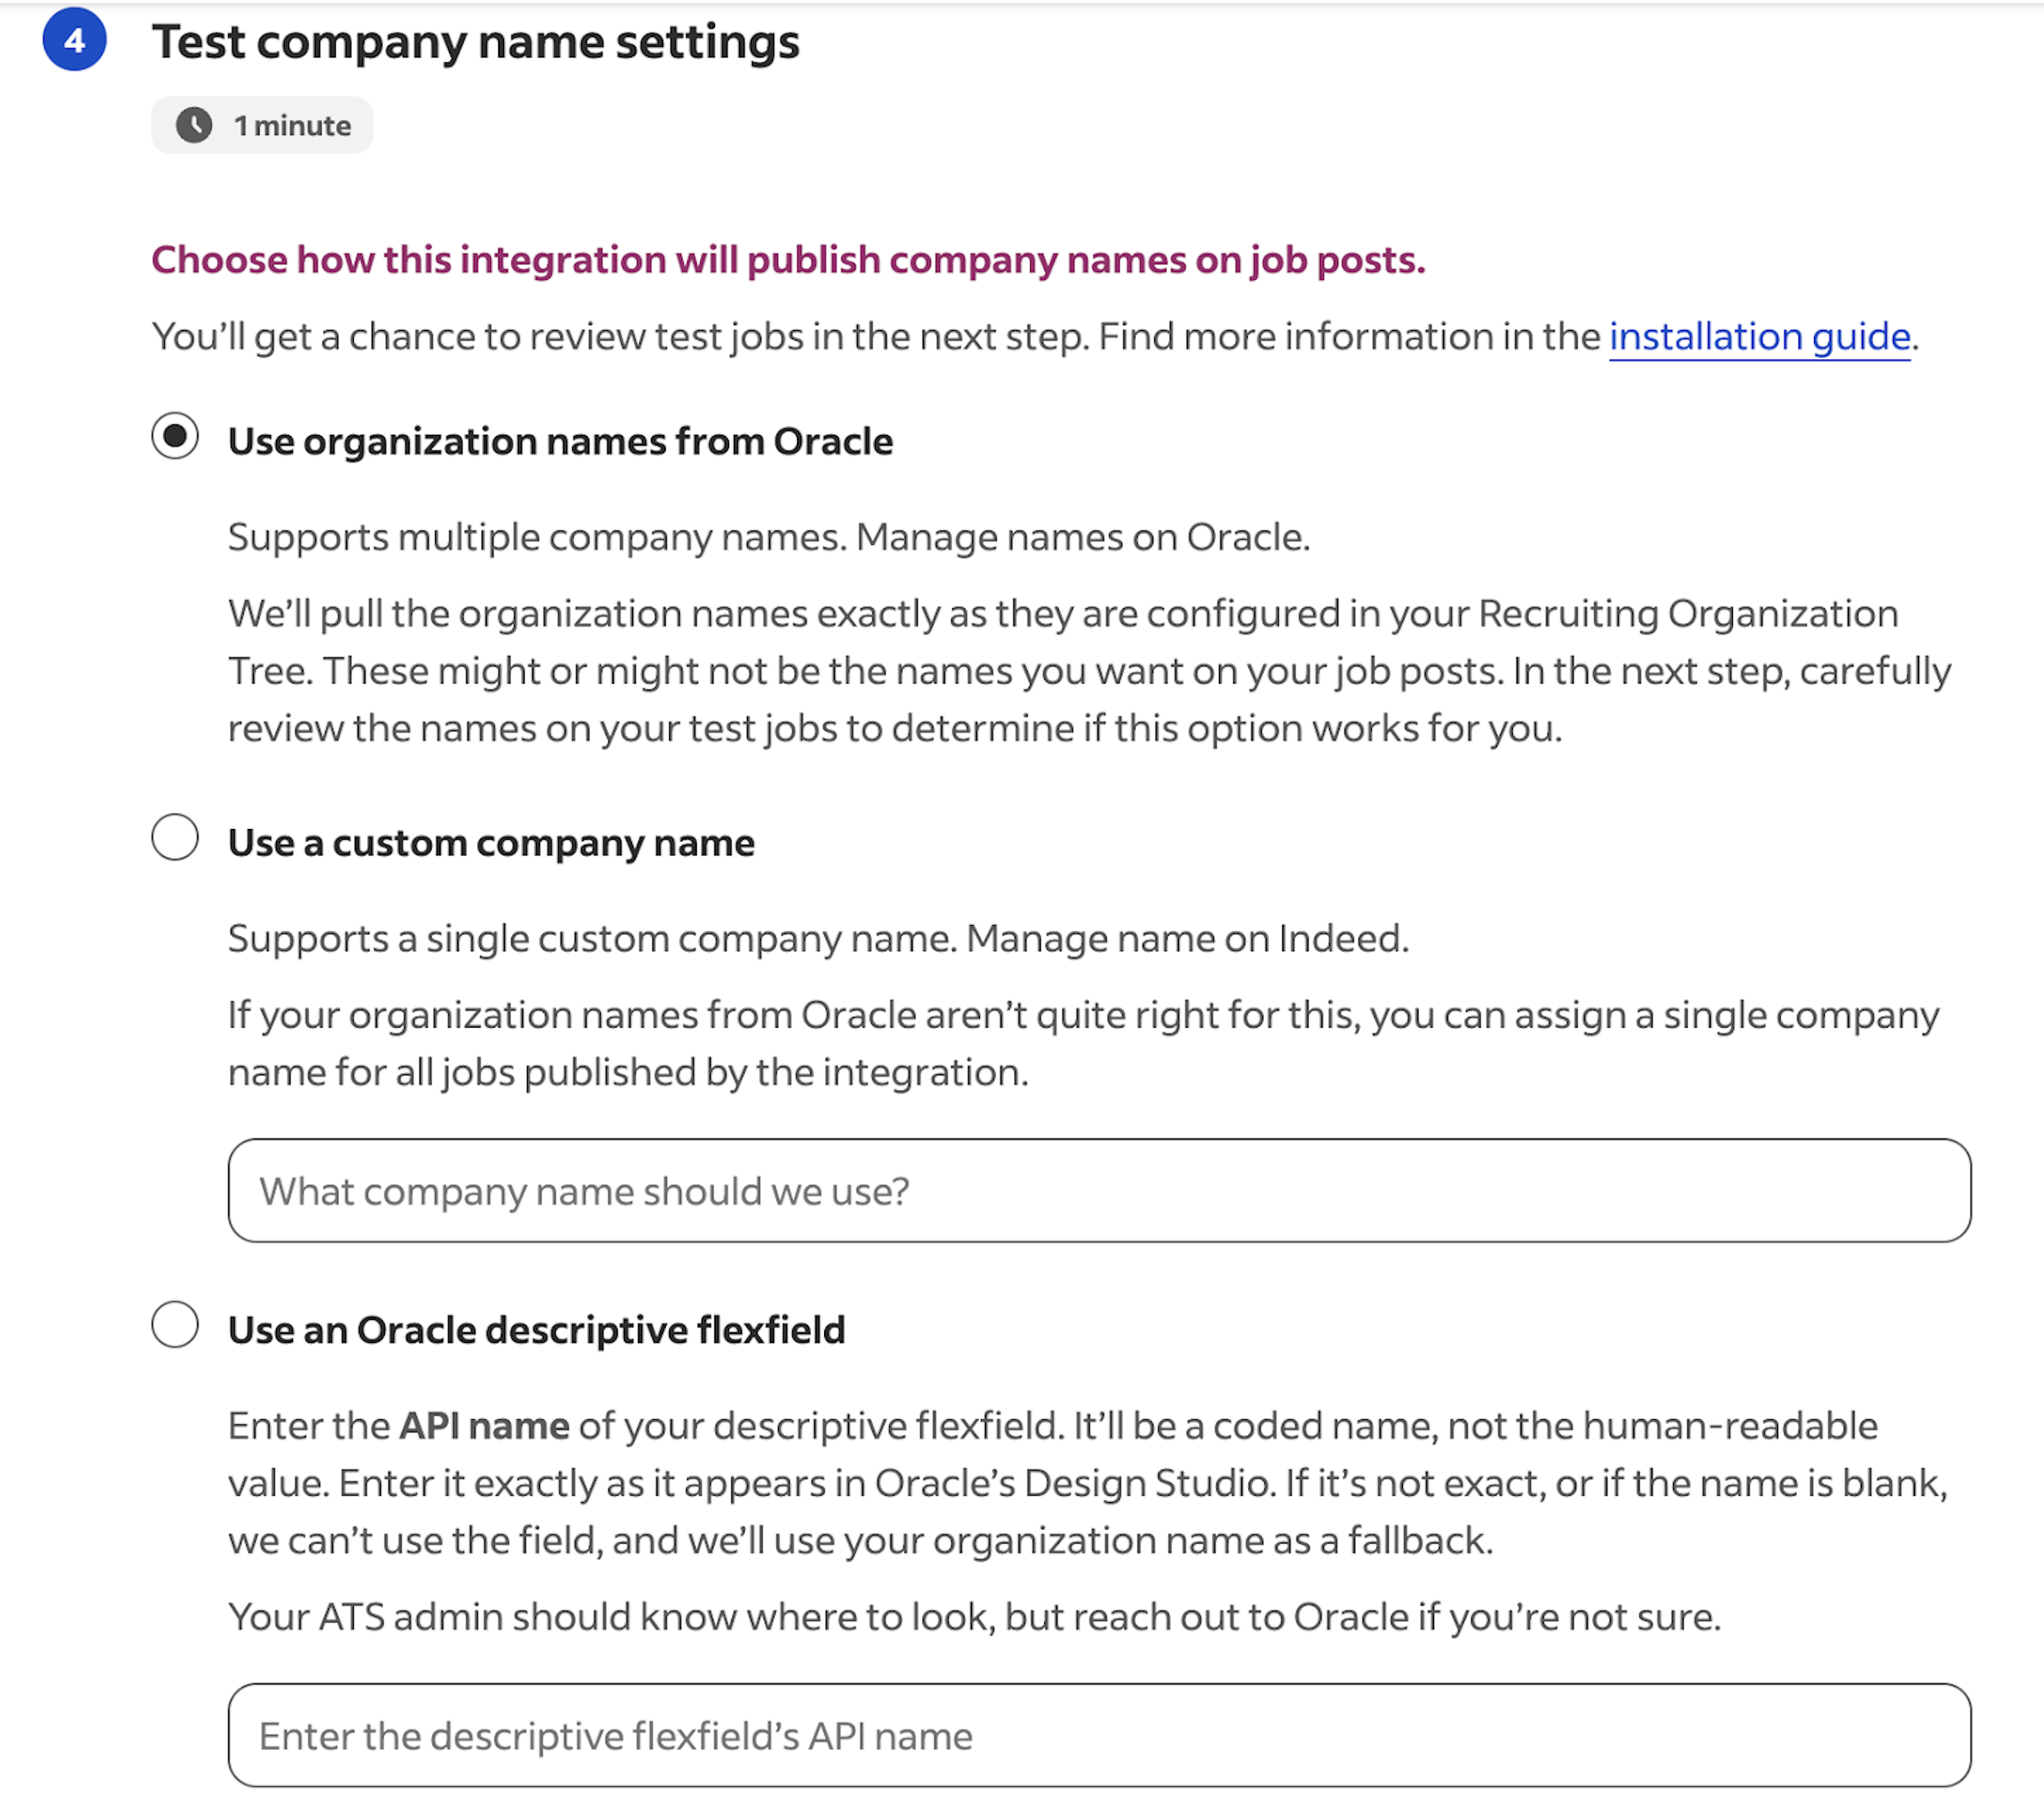
Configure how company names appear on Indeed -
(Optional) Map compensation data to one or two Oracle descriptive flexfields.
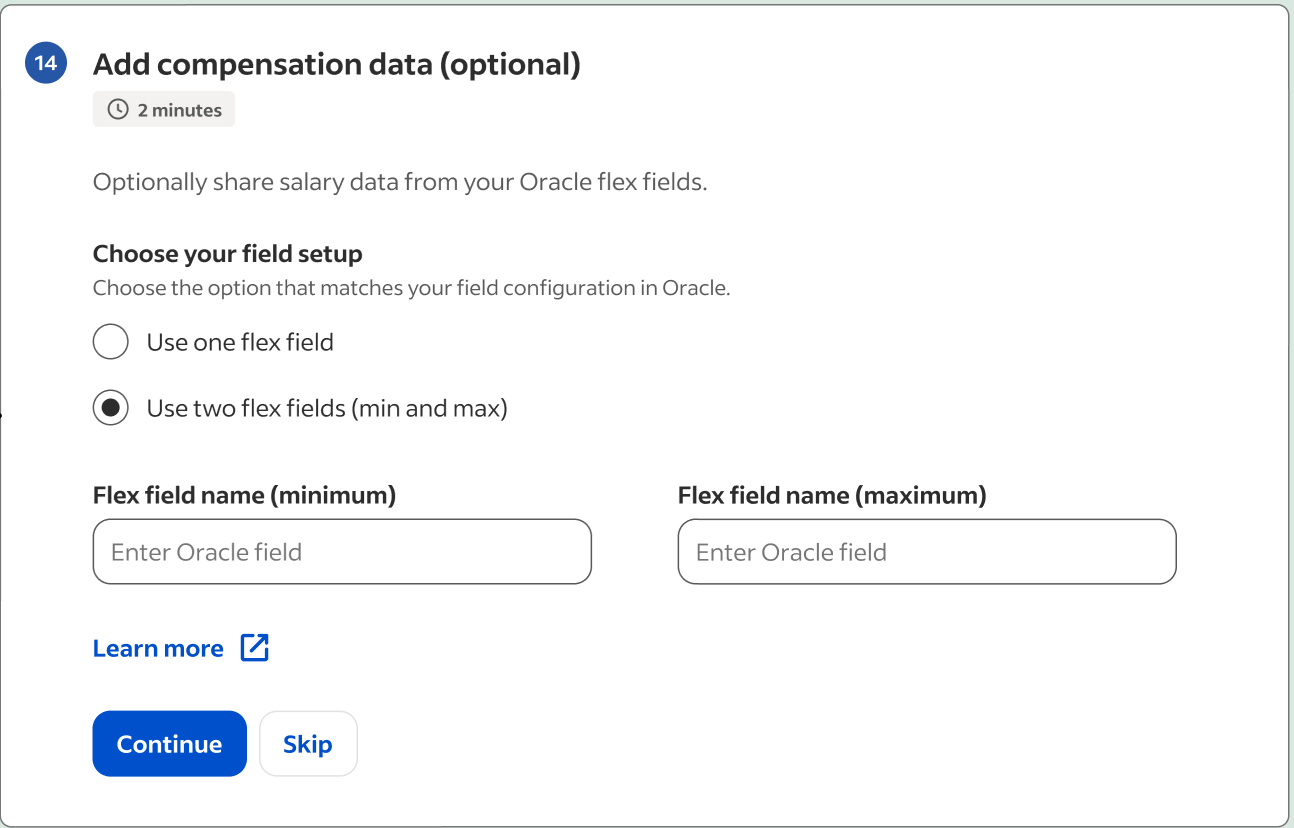
Configure optional compensation data fields -
Click Download to review your jobs and verify the mapping. Contact Indeed support with questions.
If the job details are accurate, select the checkbox and click Continue.

Download and review the test job feed -
Select the checkbox and click Continue to production if the job connection is accurate.
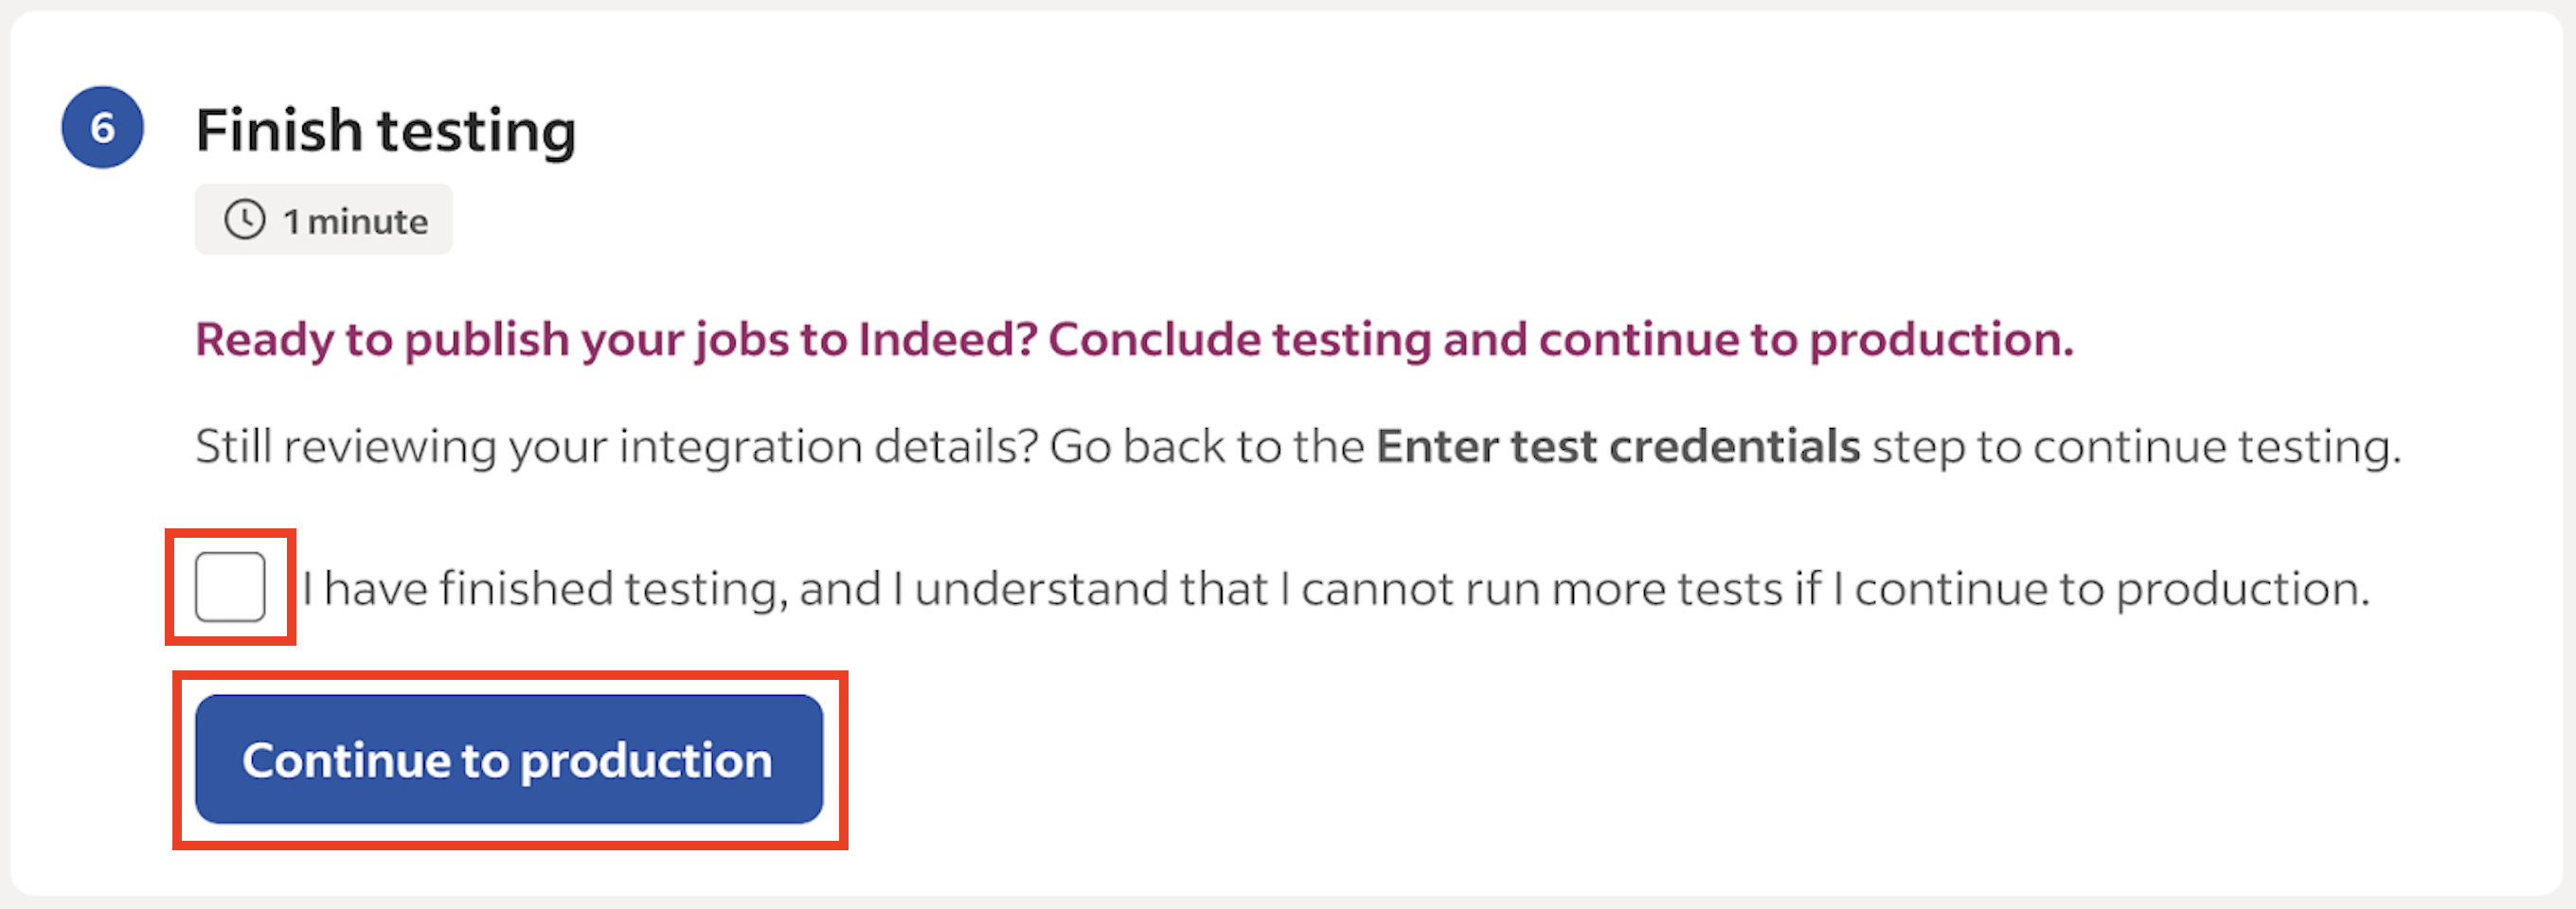
Confirm testing is complete and proceed to production setup
Step 5: Prepare to go live
Configure production credentials and activate the integration.
Your production application data settings work the same way. See Structured data.
-
Enter production credentials, select the checkbox, and click Verify production credentials.
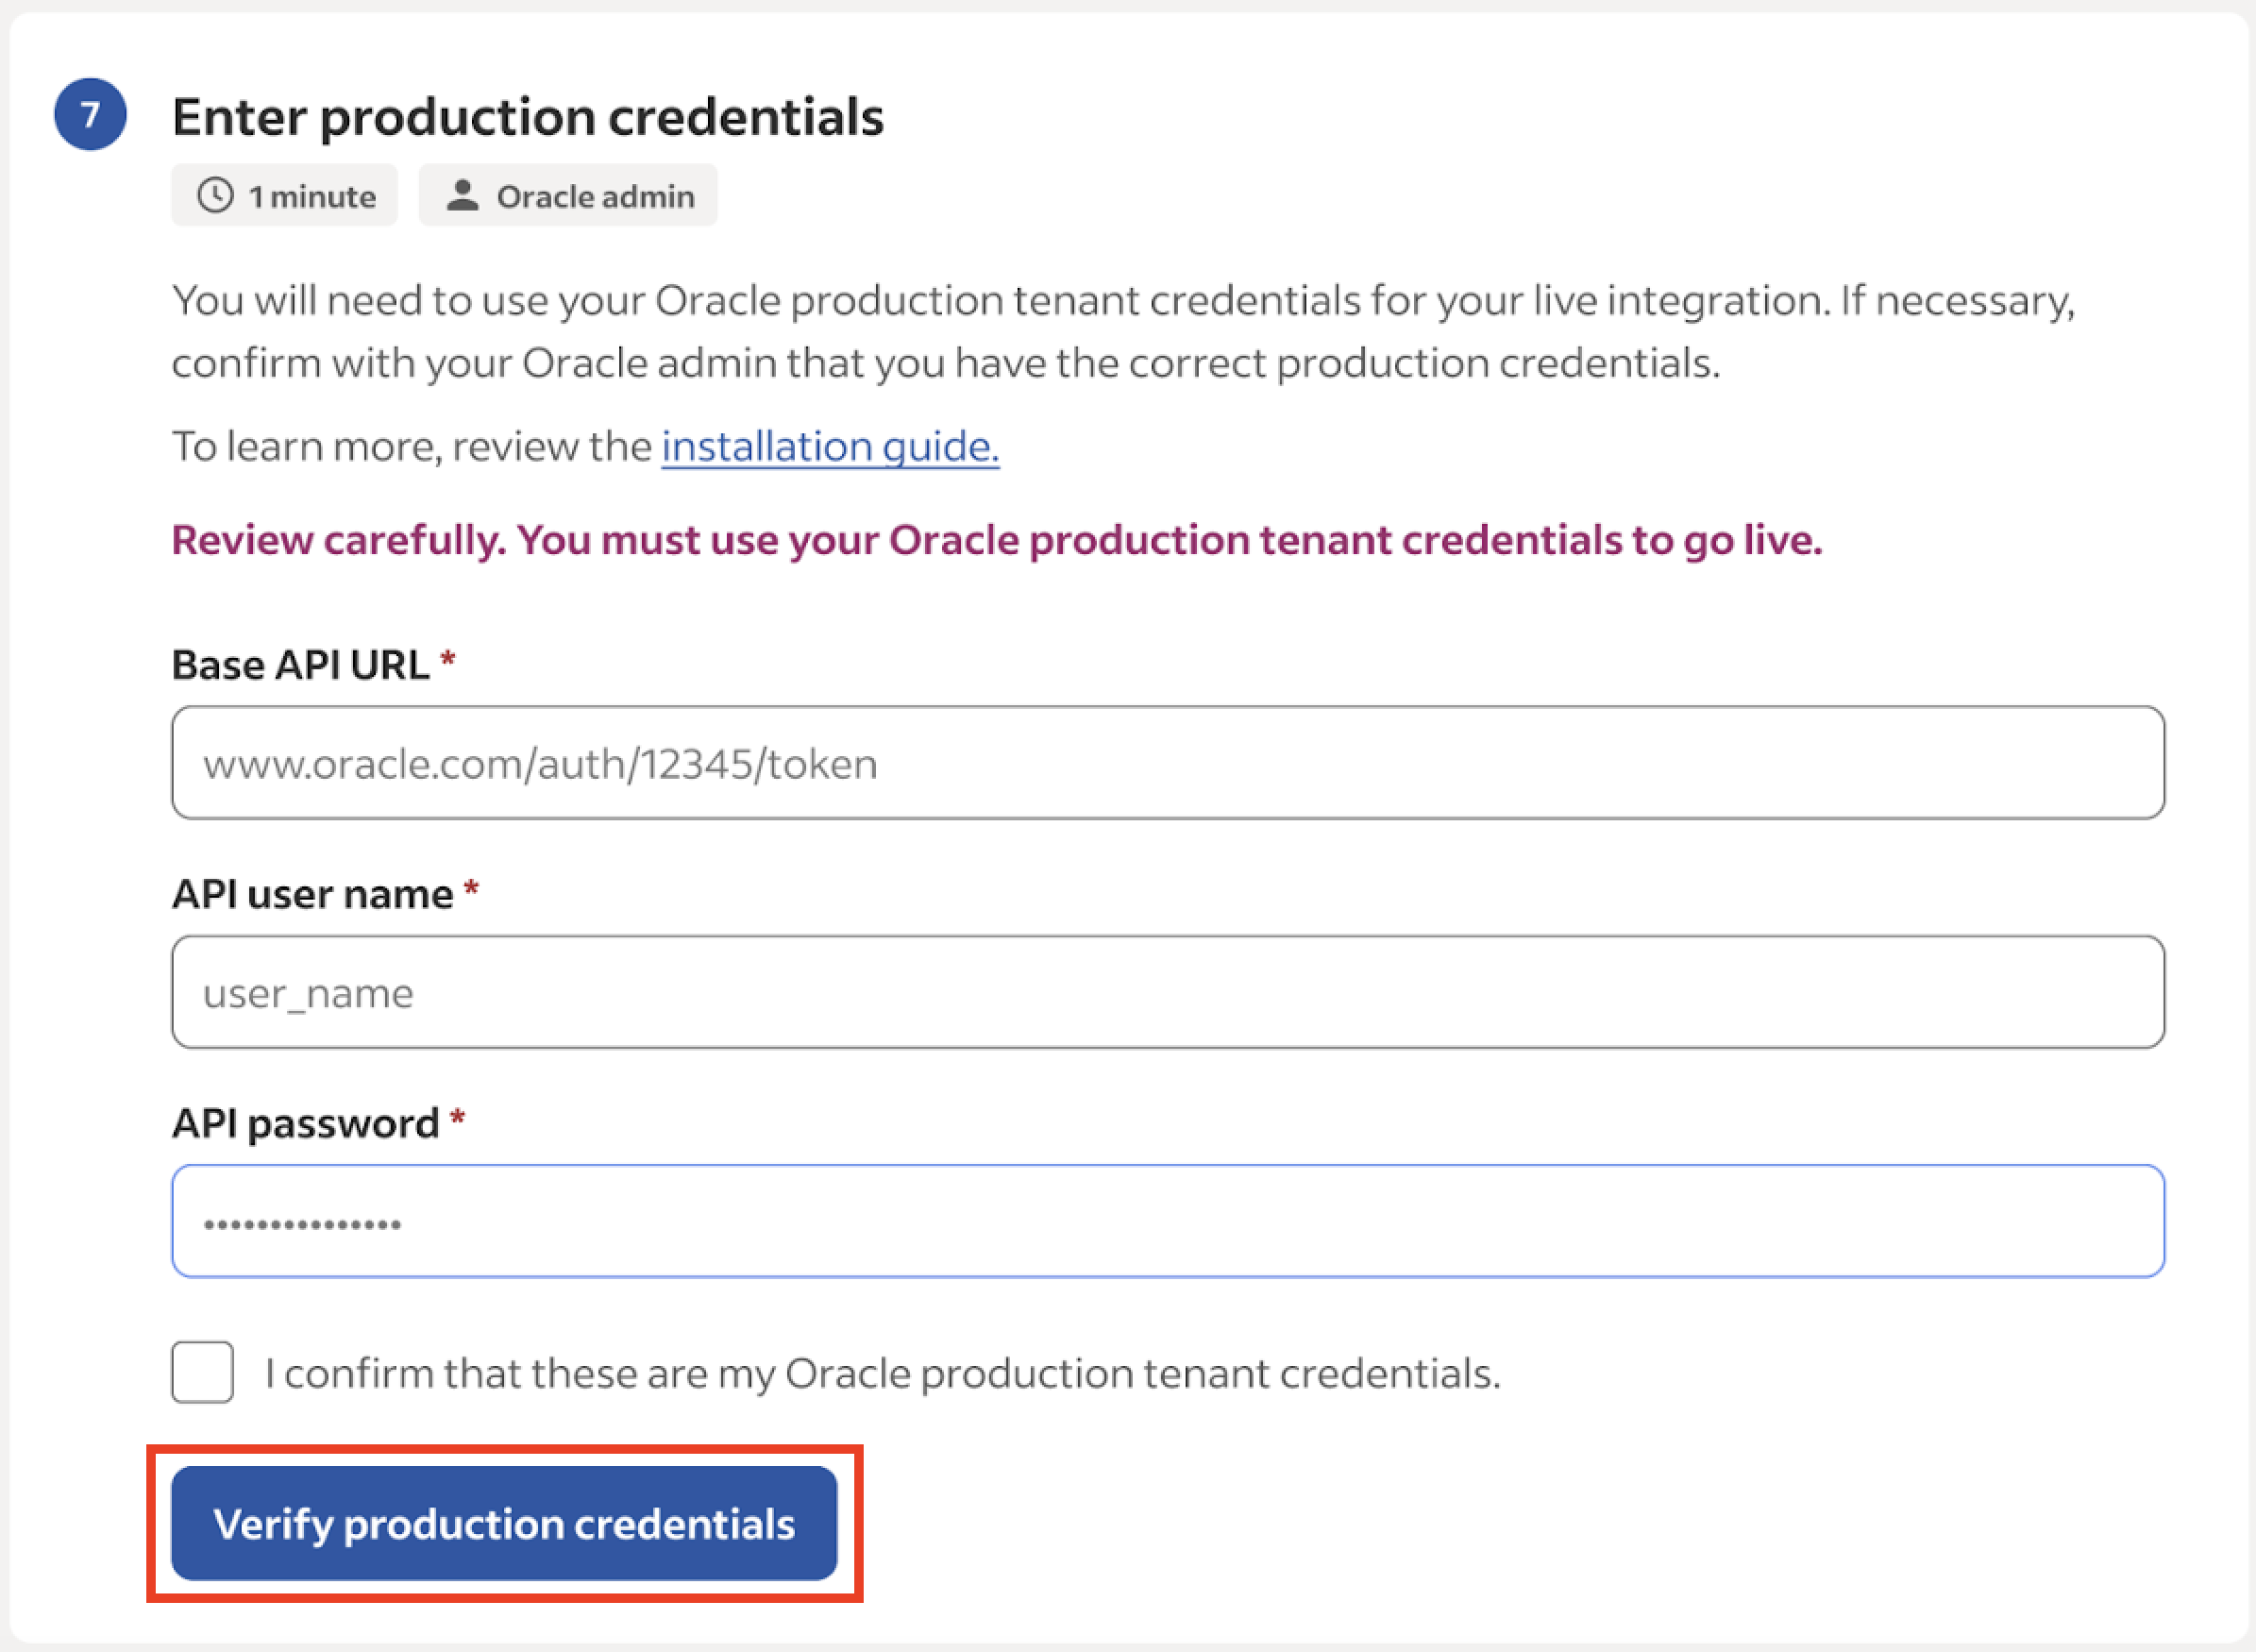
Enter production credentials -
Create API credentials at secure.indeed.com/account/apikeys/register (opens in a new window). Give the application a name and description for this integration.
Important:
- Select
OAuth 2.0for the credential type, notIndeed Apply. - In the Select OAuth grant types step, select only
Client Credentials. - The fields in the Provide additional information step are optional.
- Confirm every entry before you continue.
Enter the client ID in the installation checklist. Store the client ID and secret securely.
- Select
-
Enter the following values in Oracle. For details, see Fields to Complete for Partner Integration Configuration (opens in a new window) on the Oracle website:
- Client ID.
- Client secret.
- Reference key.
Click Continue.
-
Configure Oracle to send application status changes automatically. For details, see Send Status Notifications to Direct Apply Partners (opens in a new window) on the Oracle website.
-
Choose a company name setting for production:
- Use organization names from Oracle.
- Use a custom company name.
- Use an Oracle descriptive flexfield.
If you use an Oracle descriptive flexfield, first configure it in Oracle. See Send requisition flexfields to Indeed.
-
(Optional) Map compensation data to one or two Oracle descriptive flexfields.
Configure production compensation data fields -
Click Download to review a spreadsheet of your jobs and verify the mapping. If you have questions, contact Indeed support.
These jobs appear in production.
If the job details are accurate, the job feed is connected correctly. Select the checkbox and click Continue.
-
Indeed reviews the configuration for accuracy. When the review finishes, the Installation complete screen appears.
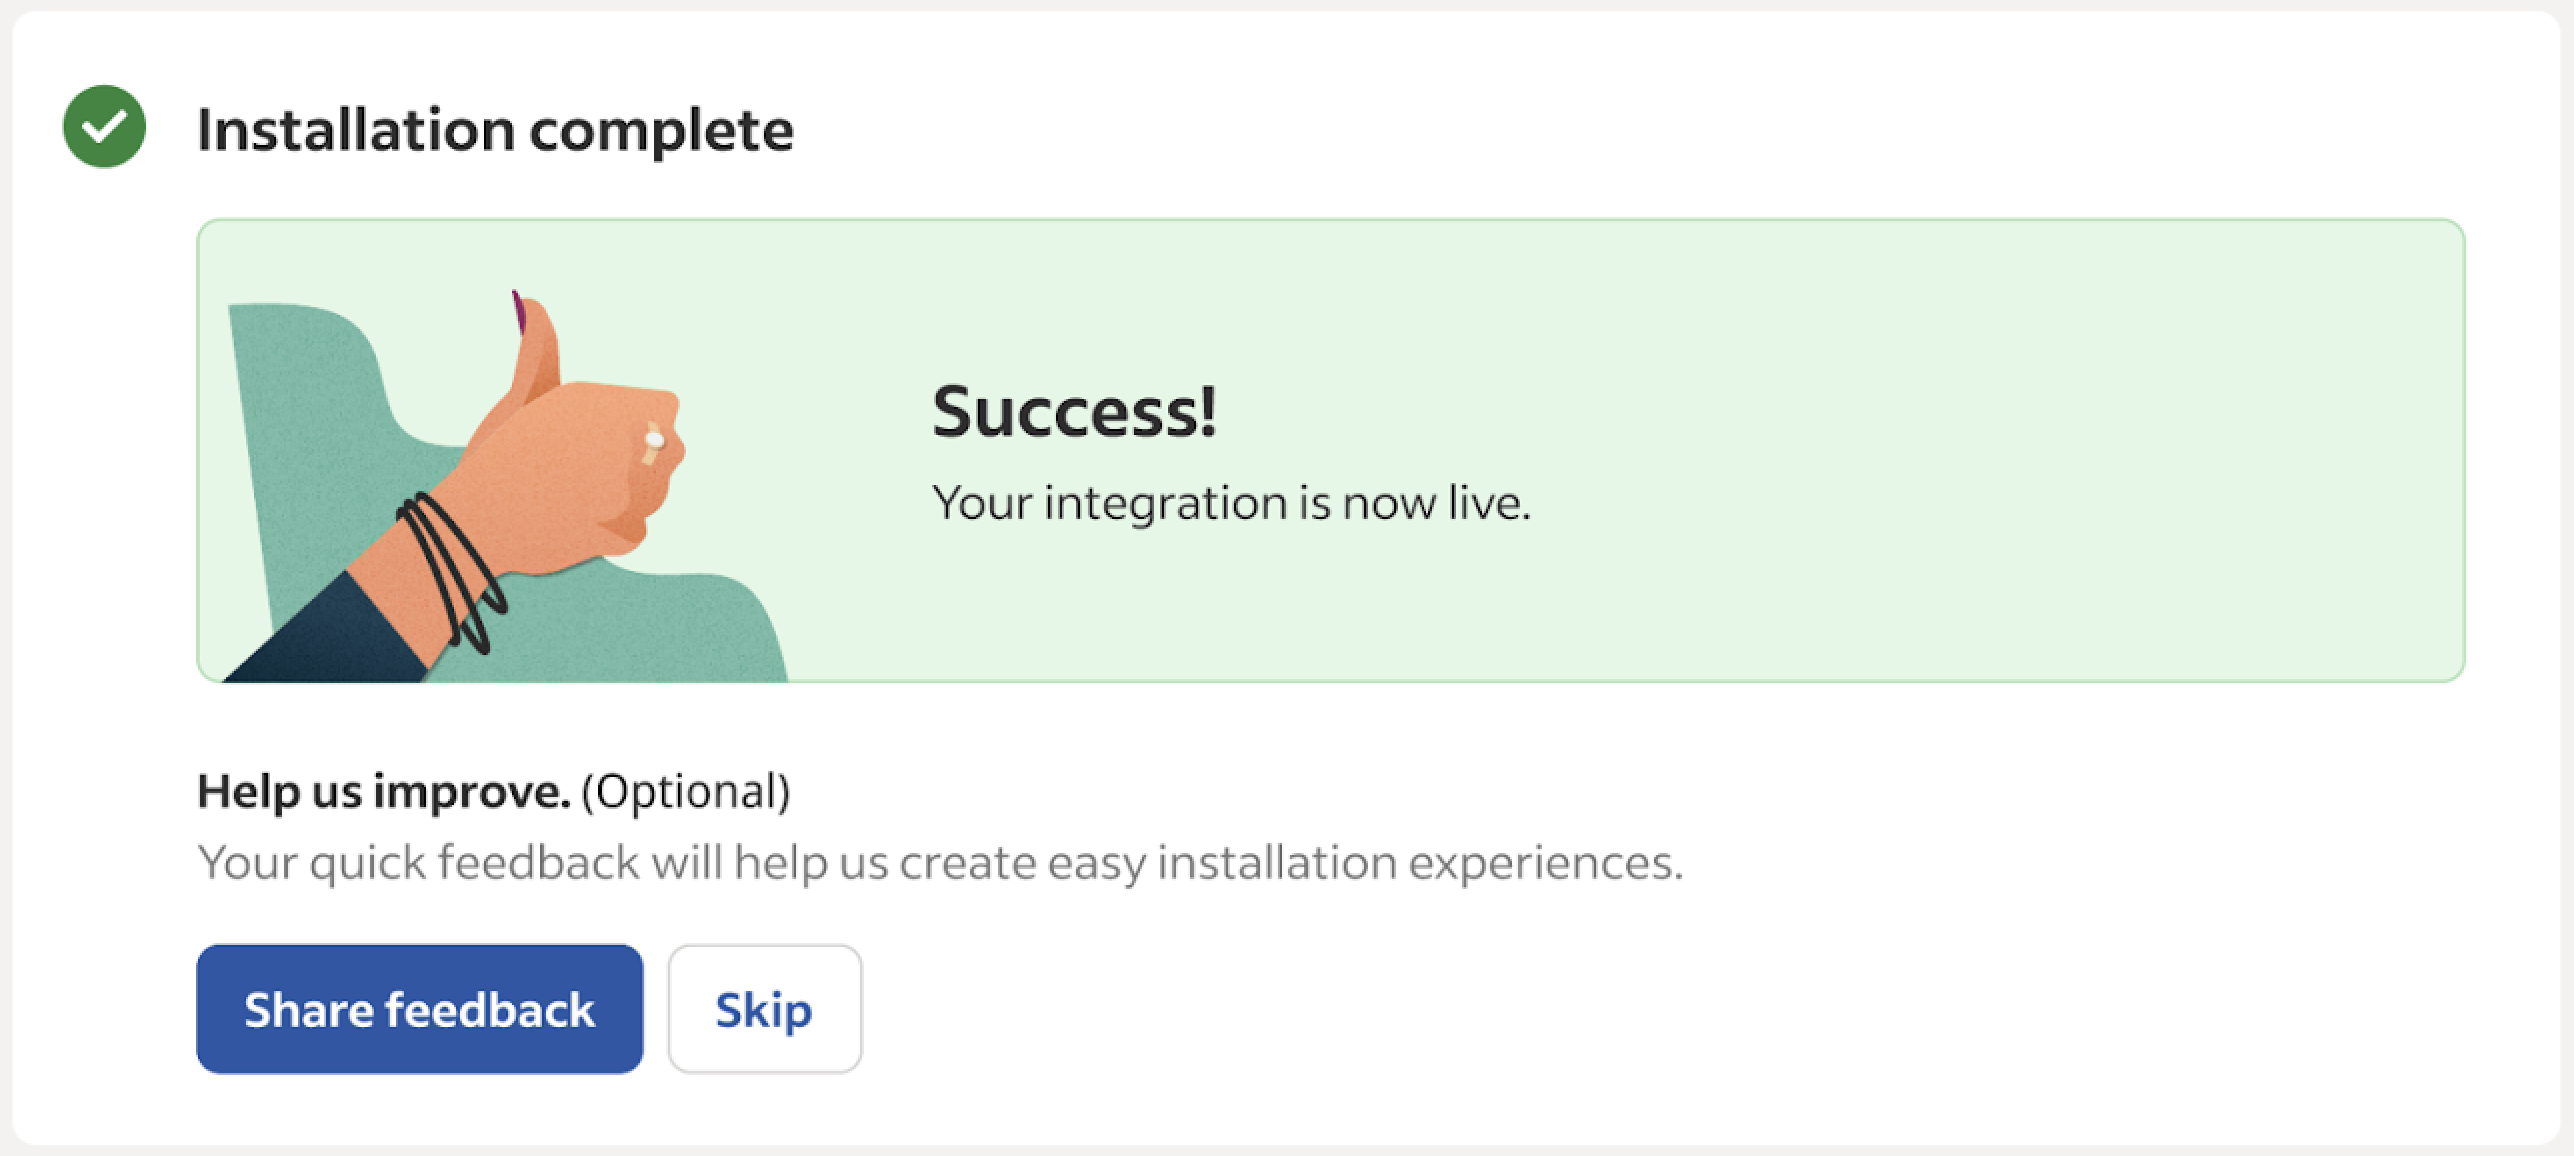
Integration installation is complete
Completed:
- Uploaded the Oracle configuration package.
- Configured and tested credentials.
- Verified the job feed in test and production.
- Activated the integration.
- Set up OAuth credentials for hiring stage sync.
Your Oracle HCM integration is active. Jobs sync to Indeed automatically.
Additional resources:
- Data mapping – Field mappings between Oracle and Indeed.
- Requisition process – How Indeed processes requisitions, plus integration limitations.